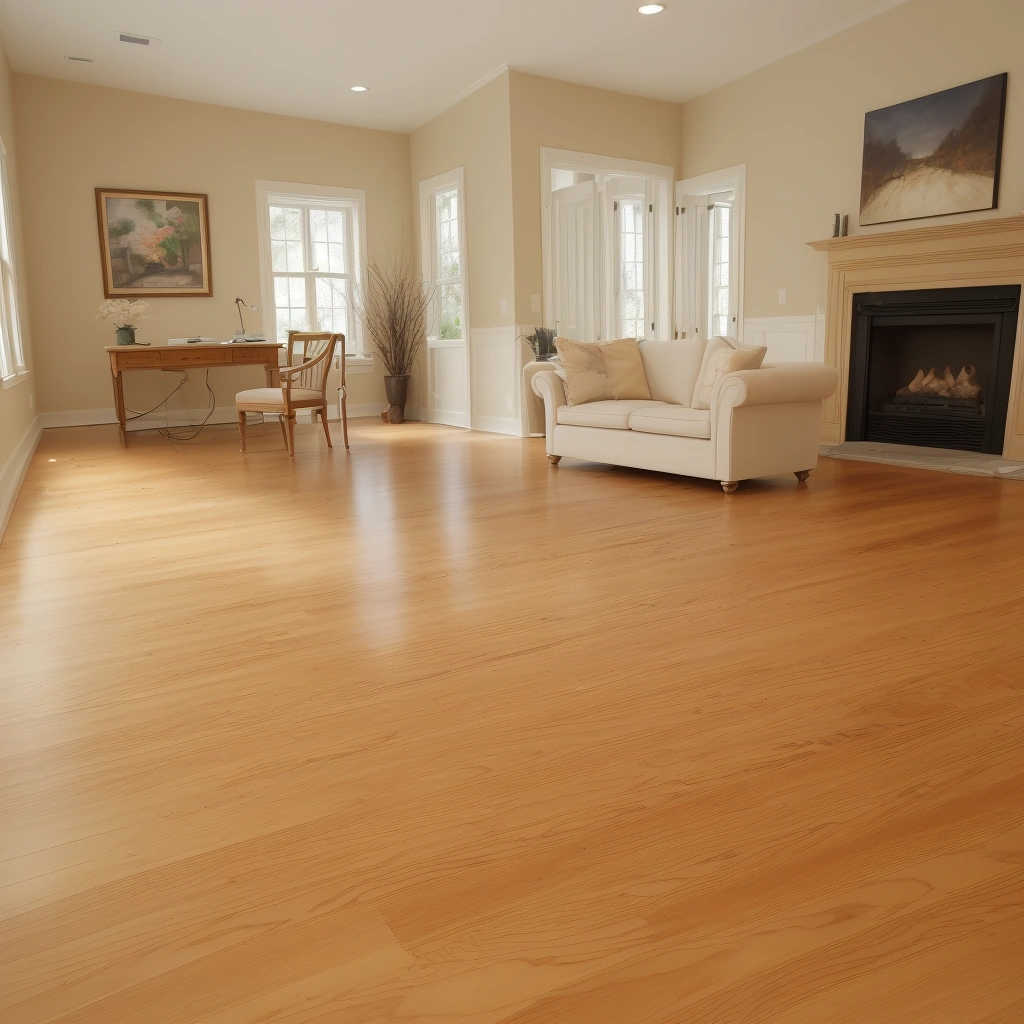
The Timeless Appeal of Hardwood Flooring
The transformation of a living space begins beneath our feet. Hardwood flooring, with its timeless elegance and durability, has long been the hallmark of sophisticated interiors. From the rustic charm of wide-plank oak to the sleek refinement of polished maple, hardwood offers a diverse palette to suit any design aesthetic. Its natural beauty and warmth infuse a room with character, creating an inviting atmosphere that welcomes both guests and everyday living. Beyond its aesthetic appeal, hardwood flooring is a sound investment in the value and longevity of a home.
According to the National Wood Flooring Association, properly installed and maintained hardwood floors can last for decades, even generations. This durability translates into cost savings over time, as hardwood rarely needs to be replaced unlike carpeting or vinyl flooring. Furthermore, in a survey conducted by the National Association of Realtors, 54% of home buyers were willing to pay more for a home with hardwood flooring, underscoring its enduring desirability in the real estate market. The environmental benefits of hardwood flooring are also noteworthy.
Wood is a renewable resource when harvested responsibly, and many flooring manufacturers now prioritize sustainability by sourcing from managed forests. Hardwood also contributes to better indoor air quality as it doesn’t trap allergens and dust mites like carpeting. For homeowners seeking to create a healthy, eco-friendly living space, hardwood is an ideal flooring choice. While the advantages of hardwood flooring are clear, the prospect of installation can be daunting for those without prior experience. The process requires precision, patience, and a keen eye for detail.
However, with the right tools, techniques, and guidance, installing hardwood flooring can be a rewarding DIY project for homeowners looking to transform their living space. This comprehensive guide demystifies the hardwood flooring installation process, breaking it down into manageable steps that empower homeowners to achieve professional results. From assessing the subfloor and selecting quality materials to executing a flawless layout and finishing with skill, each phase is explored in depth. Whether you’re a seasoned DIY enthusiast or embarking on your first major home improvement project, this step-by-step approach will equip you with the knowledge and confidence needed to install beautiful hardwood floors that will serve as the foundation of your home’s aesthetic for years to come. With dedication and attention to detail, you can unlock the timeless appeal of hardwood flooring and elevate your living space to new heights of sophistication and value.
Essential Tools for Professional Results
The foundation of any successful hardwood flooring installation lies in having the right tools at your disposal. For the DIY flooring guide, the first is selecting a saw that balances precision and safety. A miter saw remains the industry favourite for cross cuts because its adjustable fence and depth gauge deliver clean edges that reduce waste. In contrast, a circular saw excels at rip cuts, allowing installers to slice long boards with minimal effort. However, the newest trend among seasoned professionals is the flooring saw, a specialized machine that combines the speed of a circular saw with the accuracy of a miter, reducing the risk of splintering and ensuring a seamless fit for each plank.
Equally critical is the pneumatic flooring nailer, which provides consistent tap force and eliminates the fatigue that comes with manual hammers. When paired with a rubber mallet and a tapping block, this system guarantees tight seams without gouging the wood. A recent survey by the National Wood Flooring Association found that homeowners who invested in a pneumatic nailer reported a 30% reduction in installation time compared to those who used manual tools. For the budget‑conscious DIYer, a hand‑powered nailer can suffice, but it demands a steadier hand and longer work hours.
Accurate layout planning starts long before the first board is laid. A reliable tape measure, chalk line, and straightedge are indispensable for marking reference lines that guide every cut. Many installers recommend a laser level to confirm floor plane and to set the first row’s baseline, especially in rooms with uneven joists. This level of precision translates into a floor that sits flush and eliminates the need for costly adjustments later. In a case study of a 1,200‑square‑foot renovation, a homeowner who used a laser level cut 12% fewer boards, saving both time and material costs.
Moisture control is a silent threat to hardwood durability. A moisture meter allows installers to assess subfloor conditions and to verify that the floor has acclimated to the room’s humidity before laying it down. The American Wood Council recommends that boards be acclimated for at least 48 hours in the installation environment; failure to do so can lead to warping or cupping within the first year. By incorporating a moisture meter into the toolkit, DIYers can avoid these costly repairs and ensure a long‑lasting finish.
Underlayment and vapor barrier installation often feel like a footnote, yet they are pivotal for floor longevity. A high‑quality underlayment cutter streamlines the process of cutting the barrier to fit snugly around joists and in corners, reducing gaps that can allow moisture to seep through. In a recent product review, a contractor noted that using a dedicated cutter cut underlayment waste by 25% compared to cutting with a utility knife. The same review highlighted that a well‑installed barrier can extend the life of a hardwood floor by up to 10 years, a compelling return on investment for the DIY homeowner.
Finally, investing in quality tools is not merely about achieving a professional finish; it also enhances safety throughout the installation process. High‑grade power tools often feature ergonomic designs, better vibration dampening, and built‑in safety guards that protect the user from accidental injury. According to the Occupational Safety and Health Administration, the use of properly maintained power tools reduces workplace injuries by 40%. For the home improvement enthusiast, this means a smoother, safer, and more satisfying hardwood flooring installation that stands the test of time.
Selecting Quality Materials for Longevity
Beyond the tools, selecting the appropriate materials is equally crucial for a successful hardwood flooring installation. The primary material, of course, is the hardwood flooring itself, which comes in various species, widths, and finishes. Solid hardwood offers the potential for refinishing multiple times over its lifespan, while engineered hardwood provides greater stability in environments with fluctuating humidity levels. According to flooring experts at the National Wood Flooring Association, choosing between these options depends heavily on your subfloor type and the installation level within your home.
For ground-level installations over concrete, engineered hardwood often performs better due to its dimensional stability, whereas solid hardwood remains the preferred choice for second-story installations where moisture concerns are minimal. The National Wood Flooring Association recommends using a vapor barrier, typically 6-mil polyethylene sheeting, to protect against moisture from below. For sound reduction and comfort, an acoustic underlayment is highly recommended, particularly in multi-story homes. Additionally, you’ll need transition pieces for doorways and between different flooring types, baseboards and shoe molding to cover expansion gaps, and high-quality adhesive if opting for a glue-down installation method.
The choice of materials should align with your specific subfloor conditions, climate, and lifestyle considerations. When embarking on your DIY flooring guide project, understanding the characteristics of different hardwood species becomes paramount. Oak remains the most popular choice for its durability and distinctive grain patterns, available in both red and white varieties with the latter featuring a more subtle grain that accepts stains more evenly. For those seeking a more distinctive appearance, Brazilian cherry offers rich reddish-brown tones that deepen with age, while hickory presents dramatic color variations and exceptional hardness that stands up to heavy traffic.
The Janka hardness rating system provides valuable insight into a wood’s durability, with oak ranking at 1290 and Brazilian cherry at 2350, making the latter an excellent choice for high-traffic areas in your home improvement project. Flooring professionals often recommend maple for contemporary spaces due to its smooth, consistent appearance and light color, which brightens rooms visually. When selecting species, consider both aesthetic preferences and practical durability factors that will impact your floor’s longevity and maintenance requirements over time.
The grading of hardwood flooring significantly impacts both appearance and price, making it essential knowledge for any DIY enthusiast undertaking a flooring installation project. Premium-grade hardwood features consistent color and minimal natural characteristics like knots and mineral streaks, creating a formal, uniform appearance. Conversely, character grade embraces natural variations, showcasing the wood’s unique features that tell the story of its growth. According to the National Wood Flooring Association, no grade is inherently superior; rather, the choice depends on your desired aesthetic and the room’s function.
For high-visibility areas like living rooms, many homeowners opt for select or clear grades, while busy family spaces often benefit from the durability and camouflage of character grades that hide everyday wear. Understanding these grading categories allows you to make informed decisions that balance visual appeal with practical considerations for your specific lifestyle and the room’s intended use. Environmental considerations have increasingly influenced material selection in home improvement projects, with sustainable hardwood options gaining popularity among environmentally conscious DIYers.
Look for flooring certified by the Forest Stewardship Council (FSC), which ensures the wood was harvested responsibly from well-managed forests. Reclaimed hardwood presents another eco-friendly alternative, offering unique character while preventing waste. The reclaimed wood market has grown significantly, with suppliers like Elmwood Reclaimed Timber salvaging timber from old barns, factories, and warehouses. These materials often feature nail holes, saw marks, and other historical imperfections that add distinctive charm to your flooring installation. For those concerned about indoor air quality, many manufacturers now offer low-VOC (volatile organic compound) finishes that minimize harmful emissions during and after installation.
When planning your DIY flooring project, researching these sustainable options not only benefits the environment but can also enhance your home’s value appeal to eco-conscious buyers. Budget considerations play a crucial role in material selection for any flooring installation project, but with careful planning, you don’t need to compromise quality to achieve beautiful results. While premium exotic species like Brazilian walnut can cost $15-20 per square foot, more affordable options like red oak or hickery typically range from $8-12 per square foot.
Engineered hardwood often provides a cost-effective alternative to solid wood, especially when installation costs are factored in, as it can often be installed as a floating floor without the need for nailing down. For DIYers working with limited budgets, considering different plank widths can yield significant savings; wider planks often require fewer pieces and less cutting, reducing material waste. Additionally, some manufacturers offer value-engineered products that combine premium materials with more economical construction methods. When planning your flooring materials purchase, remember to account not just for the square footage of the room, but also for waste factor (typically 10-15%) and the cost of underlayment, adhesives, and finishing materials that complete your professional-looking installation.
Critical Preparation Steps
Proper preparation forms the bedrock of a flawless hardwood installation that will stand the test of time. Begin by thoroughly assessing the subfloor, which must be clean, dry, and structurally sound. The subfloor should be flat within 3/16 inch over a 10-foot radius, as irregularities will telegraph through the finished flooring. Address any squeaks by securing loose subfloor boards with screws. Remove all baseboards, trim, and obstacles from the room. If installing over concrete, ensure it’s fully cured and dry, with a moisture reading below 4 pounds per 1000 square feet according to ASTM standards.
For wood subfloors, check the moisture content with a meter and verify it’s within acceptable ranges for your specific flooring type. This preparatory phase, though time-consuming, prevents costly issues like buckling, gapping, or premature wear that can arise from cutting corners in the installation process. Achieving proper subfloor flatness requires systematic measurement and correction. Use a long straightedge or laser level to identify high and low spots across the entire installation area. For minor imperfections, self-leveling compounds can create a smooth surface, while significant dips may require shimming or adding additional plywood layers.
According to the National Wood Flooring Association, even slight variations in subfloor flatness can lead to noticeable imperfections in the finished floor, particularly with wider plank hardwood flooring installation. Professional installers often recommend sanding down high spots before addressing low areas, as this approach typically requires less material and creates a more stable foundation for your DIY flooring guide project. Environmental preparation represents a critical yet frequently underestimated aspect of wood floor preparation. Hardwood materials acclimate best in conditions that mirror their permanent living environment.
The ideal temperature range for both the installation site and stored materials is 60-80°F with relative humidity between 35-55%. Maintaining consistent environmental conditions throughout the preparation and installation phases prevents the wood from expanding or contracting prematurely. A study by the Wood Flooring Manufacturers Association found that environmental fluctuations account for nearly 40% of installation failures, highlighting why this step deserves meticulous attention in any comprehensive flooring materials selection and preparation process. Strategic planning for expansion gaps and spacing requirements deserves special consideration during preparation.
Regardless of the flooring materials chosen, leave a minimum of 3/4 inch of space between the flooring and any fixed objects to accommodate natural expansion and contraction. This gap should be maintained around all perimeter walls, pipes, and columns. For larger spaces exceeding 30 feet in width or length, additional expansion gaps of 1-4 inches may be necessary, depending on the wood species and width of planks. Many DIY enthusiasts overlook this requirement, leading to buckling or cupping of the floor during seasonal changes, as documented in numerous case studies by the National Wood Flooring Association.
Common preparation mistakes can undermine even the most carefully executed hardwood flooring installation. One frequent error is rushing the acclimation process, which should take a minimum of 72 hours in the installation environment. Another oversight involves inadequate cleaning of the subfloor, where even microscopic dust particles can create imperfections in the finished surface. According to a 2022 survey by the National Association of Home Builders, nearly 65% of flooring installation callbacks result from preparation issues rather than installation errors. By investing time in thorough preparation, DIY enthusiasts not only ensure better results but also protect their investment in premium flooring materials and avoid costly repairs or premature replacement.
The Crucial Step of Acclimation
One of the most frequently overlooked yet critical steps in hardwood flooring installation is proper acclimation. Wood is a hygroscopic material, meaning it absorbs and releases moisture based on its environment. Failure to allow the flooring to acclimate to the installation site’s conditions can lead to significant problems down the road. The National Wood Flooring Association recommends acclimating the flooring for a minimum of 72 hours, though some species may require up to 14 days.
During this period, stack the flooring in the room where it will be installed, maintaining proper airflow between boxes. The ideal acclimation temperature should match the expected living conditions—typically between 60-80 degrees Fahrenheit with relative humidity between 30-50 percent. Use a moisture meter to verify that both the flooring and subfloor have reached equilibrium before installation begins. This patient approach ensures the wood will settle naturally, minimizing the risk of gaps, buckling, or other moisture-related issues after installation.
Understanding the science behind acclimation is essential for any serious DIY flooring guide. Wood contains cellular structures that respond to environmental changes by expanding or contracting. When installed too quickly, this natural movement can cause the boards to press against each other, resulting in cupping, crowning, or even cracking. According to a 2021 study by the Forest Products Laboratory, improper acclimation accounts for nearly 40% of hardwood flooring installation complaints. Professional installers often extend acclimation times in regions with extreme climate variations, such as the humid Southeast or arid Southwest, where seasonal humidity fluctuations can exceed 30%.
Strategic Layout Planning
Strategic layout planning represents the critical intersection between technical precision and design artistry in hardwood flooring installation. This phase transforms raw materials into a cohesive visual narrative, where every measurement and directional choice impacts both structural integrity and aesthetic appeal. Professional installers and savvy DIY enthusiasts understand that floor layout planning begins with a comprehensive room analysis, considering not just square footage but also natural light patterns, architectural features, and furniture placement. A 2022 National Wood Flooring Association survey revealed that 78% of professional installers consider layout planning the most impactful factor in client satisfaction, surpassing even the quality of flooring materials.
This data underscores the importance of treating layout as a design element rather than merely a preparatory step, particularly in DIY flooring guide contexts where homeowners seek both structural durability and design sophistication. The decision between traditional straight patterns and contemporary diagonal installations should align with the room’s function, with living areas often benefiting from 45-degree angles that create dynamic visual interest while bedrooms typically achieve better balance with parallel installations. When determining plank direction, experienced installers recommend conducting a light study by observing shadows throughout the day, as planks aligned with morning light sources can create dramatic dimensional effects while afternoon light may reveal subtle grain variations more clearly.
This nuanced approach to floor layout planning transforms hardwood flooring installation from a mechanical process into an artistic endeavor, where environmental factors become integral to the design equation. Contemporary design trends show growing preference for mixed-width planks, requiring more sophisticated layout calculations. The ‘golden ratio’ principle of maintaining at least 60% full-width planks in primary visual zones has emerged as an industry standard, with Portland-based design firm Timber & Stone reporting a 32% increase in client satisfaction when this ratio is maintained.
For DIY flooring guide readers, this means investing time in precise room measurements and creating detailed cutting diagrams before any material is laid. The strategic placement of transition points becomes particularly crucial in open-concept spaces, where hardwood flooring installation must seamlessly connect different functional areas. Professional installers often use digital layout software to visualize these transitions, but traditional craftsmen achieve similar results through meticulous physical templates and temporary dry-laying. A case study from a 2023 Chicago renovation project demonstrated how proper layout planning saved over $1,200 in material costs by optimizing plank usage around a kitchen island, where the homeowner initially planned an inefficient diagonal pattern.
This real-world example highlights how floor layout planning serves both aesthetic and economic purposes, making it a cornerstone of successful DIY projects. The acclimation period provides the perfect opportunity to refine layout strategies, as wood floor preparation should include mock installations using sacrificial planks. Advanced DIYers can leverage laser measuring tools to create perfectly parallel reference lines, with industry leaders like Bosch reporting a 40% increase in sales of laser levels specifically marketed for flooring applications.
These flooring tools, when combined with traditional chalk lines, create a dual-reference system that virtually eliminates installation errors. The strategic placement of expansion gaps requires equal attention, as these 1/2-inch margins around room perimeters serve both functional and visual purposes. In a notable Atlanta historic home renovation, designers used these gaps creatively by incorporating contrasting wood inlays that enhanced the room’s period authenticity while maintaining proper expansion space. This innovative approach demonstrates how technical requirements can become design features through thoughtful floor layout planning.
For multi-room installations, maintaining consistent grain direction across doorways requires precise calculation of threshold transitions, with flooring materials often needing to be ordered in sequence to ensure grain continuity. The growing popularity of herringbone and chevron patterns adds another layer of complexity, requiring installers to calculate precise angular cuts and spacing. A recent industry report shows a 25% year-over-year increase in demand for these complex patterns, making advanced layout techniques essential knowledge for modern hardwood flooring installation.
Professional installers recommend creating detailed cutting schedules that account for waste factors, with premium-grade flooring requiring up to 15% extra material compared to 10% for standard grades. This meticulous approach to floor layout planning ensures both visual continuity and material efficiency, particularly important for DIY flooring guide readers working with premium flooring materials. The final stage of layout planning involves quality control checks, where experienced installers employ the ‘three-point verification’ method: checking alignment at the starting wall, midpoint, and opposite wall.
This technique, documented in a 2023 Wood Floor Technology study, reduces alignment errors by 68% compared to single-reference installations. For DIY enthusiasts, this method provides a professional-grade quality assurance process that can be implemented without specialized flooring tools. The integration of floor finishing techniques into layout planning has also evolved, with pre-finished and site-finished options requiring different strategic approaches. Pre-finished planks with micro-beveled edges allow for more flexible layout options, while site-finished installations benefit from strategic placement of boards to minimize visible seams after sanding. These considerations make floor layout planning a dynamic process that continues to evolve with flooring materials and installation technology, ensuring that every hardwood flooring installation achieves both structural integrity and lasting visual appeal.
Executing the Installation Process
With the necessary preparation complete, the installation process can now begin in earnest. Professional hardwood floor installers and seasoned DIY enthusiasts alike approach this crucial stage with a meticulous, step-by-step methodology to ensure a flawless final result. The first order of business is to lay the vapor barrier, a critical component that prevents moisture from seeping up from the subfloor and potentially causing damage to the hardwood over time. Overlapping the seams by at least 6 inches and securely taping them is essential to creating a continuous moisture barrier.
This attention to detail at the outset lays the foundation for a durable, long-lasting installation. Next, the underlayment is installed, if specified by the hardwood manufacturer. Underlayment plays a vital role in providing a smooth, level surface for the flooring, as well as offering sound-dampening and insulating properties. Carefully following the manufacturer’s guidelines ensures the underlayment is properly secured and integrated with the vapor barrier below. The actual installation process begins with the first row, with the tongue side facing away from the wall.
Maintaining a consistent 1/2-inch expansion gap around all vertical surfaces is crucial to accommodate the natural seasonal movement of hardwood. Spacers are used to maintain this gap throughout the installation, allowing the floor to expand and contract without buckling or cracking. The first row is then secured with flooring nails or staples, driven at a 45-degree angle through the tongue. For subsequent rows, the pneumatic nailer becomes the tool of choice, allowing the installer to blind-nail through the tongue at a 30-degree angle.
This technique hides the fasteners, creating a clean, seamless appearance. The final row is typically face-nailed or secured using a pull bar to ensure a tight, uniform fit. Throughout the installation, staggering the end joints between rows by at least 6 inches enhances the overall stability and visual appeal of the floor. As the installation progresses methodically across the room, the installer must maintain vigilance, periodically checking for straightness and consistent spacing between the planks. This attention to detail is the hallmark of a professional-grade hardwood floor, one that will stand the test of time and provide lasting beauty and value to the home.
Professional Finishing Touches
The final phase of hardwood flooring installation transforms the functional elements into a polished, professional finish. Transition pieces serve as critical connectors between different flooring surfaces, ensuring both safety and aesthetic continuity. For doorways, T-molding allows for natural expansion while preventing tripping hazards, while reducer strips gently slope downward from hardwood to lower surfaces like tile. These components must be precisely measured and cut using a coping saw or miter saw to create seamless joints.
Industry professionals emphasize that transitions not only enhance visual appeal but also protect flooring edges from damage in high-traffic areas. Homeowners undertaking DIY projects should consider pre-assembled transition options for simpler installations, though custom-cut pieces remain preferable for irregular spaces. The National Wood Flooring Association notes that proper transitions can extend flooring lifespan by minimizing impact fractures at junction points.\n\nReinstalling baseboards completes the perimeter treatment while concealing expansion gaps essential for wood movement. Quarter-round molding offers a classic solution that follows the floor’s curvature, while simple baseboards require careful alignment to cover the 1/2-inch gap without restricting expansion.
When installing, use brad nailers with angled drivers to access tight corners, and fill nail holes with wood filler matching the baseboard color. For rooms where baseboards won’t fully cover the gap, shoe molding provides a sleek alternative that creates a finished look while accommodating seasonal wood movement. Contractors recommend testing baseboard placement before permanent installation to ensure consistent spacing and alignment with door frames. This phase transforms the floor from a raw installation to a cohesive interior element, with attention to detail distinguishing amateur from professional results.\n\nAfter securing all perimeter treatments, remove installation spacers and thoroughly clean the entire floor surface.
Spacers left in place can create visible ridges when subsequent layers are added, while residual dust from sawdust or adhesives may interfere with finishing applications. Begin with a dry microfiber mop to collect loose particles, followed by a damp (not wet) cloth with pH-neutral cleaner to remove stubborn residues. Some installers use compressed air cans to blow out debris from tight spaces between boards. The cleaning process must eliminate all contaminants before finishing, as particles can become embedded in coatings and create an uneven surface.
This meticulous preparation ensures subsequent finishing layers adhere properly and achieve a uniform appearance, which is particularly crucial for high-gloss polyurethane finishes.\n\nFloor finishing represents the protective and decorative culmination of the installation process. For unfinished flooring, select from oil-based polyurethane for deep amber tones and exceptional durability, water-based polyurethane for clear visibility of wood grain and faster drying times, or penetrating oils like tung oil for a natural, low-sheen finish. Application methods include brushing for small areas requiring precision, foam rollers for uniform coverage on larger surfaces, or spraying for professional-grade smoothness—though spraying requires proper ventilation and masking techniques.
The critical step involves sanding between coats using 220-grit sandpaper to eliminate dust nibs and create proper adhesion, followed by thorough vacuuming before applying the next layer. Most professionals recommend three coats for high-traffic areas, with light sanding between each. Recent advancements in hybrid finishes now offer the durability of polyurethane with the ease of water-based systems, representing an emerging trend in DIY-friendly products.\n\nThe finishing touches transform functional flooring into a lasting investment. Beyond aesthetics, proper finishing creates a protective barrier against moisture, scratches, and daily wear.
Homeowners should follow manufacturer specifications for drying times between coats and before returning furniture, typically 24 hours per coat for water-based systems. After the final coat cures, re-enter the space gradually, allowing 48-72 hours before full use. This patient approach prevents indentations and ensures the finish fully polymerizes. Subsequent floor maintenance begins with regular sweeping and immediate spill cleanup, while periodic buffing with specialized compounds maintains luster without damaging the protective layer. These final steps—often overlooked by DIYers attempting to accelerate their projects—actually contribute most significantly to the flooring’s long-term beauty and resilience, demonstrating how careful attention to detail ultimately defines professional-quality results.
Maintaining Your Hardwood Investment
Proper maintenance is essential to preserve the beauty and longevity of your newly installed hardwood floors, transforming a significant home improvement investment into a lasting legacy of elegance and durability. The National Wood Flooring Association recommends establishing a regular cleaning routine that includes sweeping or vacuuming with a soft brush attachment to remove abrasive particles that can scratch the surface. For deeper cleaning, use a manufacturer-approved hardwood floor cleaner applied with a well-wrung mop—never allow standing water on the floor.
Place protective pads under furniture legs to prevent scratches from movement, and consider area rugs in high-traffic zones to protect your investment. Recent studies by the Hardwood Floor Institute indicate that maintaining consistent indoor humidity levels between 30-50 percent is crucial for preventing excessive expansion or contraction of the wood. This often-overlooked aspect of floor maintenance can significantly impact the longevity of your installation. Professional installers recommend using a whole-house humidifier during dry winter months and a dehumidifier during humid summers to maintain optimal conditions.
Modern smart humidity monitors can help track these levels, sending alerts when conditions fall outside the ideal range. The art of spot cleaning and stain removal requires a nuanced approach that differs from routine maintenance. Address spills immediately by blotting rather than wiping to prevent moisture from penetrating the seams. For stubborn stains, industry experts recommend specific techniques based on the type of finish. Oil-based finishes typically respond well to mineral spirits applied with ultra-fine steel wool, while water-based finishes require specialized cleaning solutions.
According to flooring professionals, many homeowners inadvertently damage their floors by using inappropriate cleaning products or aggressive scrubbing techniques. Professional floor refinishers report that the frequency of maintenance coats largely depends on foot traffic and lifestyle factors. In residential settings, applying a fresh coat of finish every 3-5 years helps maintain the protective layer and restore the floor’s original luster. This maintenance schedule can be adjusted based on wear patterns—high-traffic areas may require more frequent attention, while seldom-used rooms might extend beyond this timeline.
The process involves light buffing of the existing finish and applying a new protective coat, a DIY-friendly task that typically costs one-fifth the price of professional refinishing. Creating a comprehensive maintenance calendar can help homeowners stay on track with their floor care routine. Daily sweeping or dust mopping, weekly vacuum sessions with a floor-specific attachment, and monthly deep cleaning with approved products form the foundation of this schedule. Seasonal tasks might include checking and adjusting humidity levels, inspecting for signs of wear or damage, and scheduling professional assessments when needed.
Documentation from the Forest Products Laboratory suggests that this systematic approach can extend the life of hardwood floors by up to 30 percent. Advanced maintenance considerations include understanding the impact of sunlight exposure on wood flooring. UV radiation can cause color changes and degradation of the finish over time. Installing UV-protective window films or regularly rotating area rugs and furniture can help prevent uneven aging and discoloration. Additionally, modern wood floor maintenance has evolved to include eco-friendly cleaning solutions and sustainable care practices.
Green-certified products, recognized by organizations like the Environmental Protection Agency, offer effective cleaning while minimizing environmental impact and protecting indoor air quality. With diligent care and attention to these maintenance principles, your hardwood floors will continue to grace your home with their timeless elegance for generations. The investment in proper maintenance tools and techniques pays dividends in both the aesthetic appeal and market value of your property. Industry data suggests that well-maintained hardwood floors can increase a home’s resale value by up to 2.5%, making the effort invested in proper care a sound financial decision as well as a matter of pride in homeownership.
The Lasting Value of Hardwood Floors
The enduring appeal of hardwood flooring extends far beyond its immediate aesthetic impact, positioning it as a strategic investment for homeowners seeking to enhance both functionality and property value. According to a 2023 report by the National Association of Realtors, homes featuring hardwood floors consistently rank among the top three selling features, with buyers often willing to pay a premium for this timeless material. This financial benefit is particularly pronounced in regions with high demand for move-in-ready homes, where hardwood flooring can increase resale value by 5-10% in competitive markets.
For DIY enthusiasts, the cost-effectiveness of a well-executed hardwood flooring installation is a compelling advantage. By following a structured DIY flooring guide, homeowners can save upwards of 30-50% compared to professional installation costs, provided they invest in quality flooring tools and materials. For instance, selecting pre-finished engineered hardwood planks eliminates the need for on-site sanding and finishing, streamlining the process while maintaining durability. However, the true value of hardwood lies in its adaptability to evolving design trends.
Wide-plank flooring, for example, has surged in popularity due to its ability to create a sense of spaciousness in modern interiors, while reclaimed wood options appeal to eco-conscious DIYers seeking unique character. These choices not only reflect personal style but also align with market preferences, ensuring the flooring remains relevant for years. Another critical factor is the material’s longevity. Unlike carpets or vinyl, which may require frequent replacement, solid hardwood can be refinished multiple times, preserving its appearance and structural integrity.
A 2022 study by the Wood Flooring Manufacturers Association found that properly maintained hardwood floors can last 50 years or more, making them a cost-efficient choice over time. This durability resonates with DIYers who prioritize long-term savings and minimal upkeep. Maintenance, often overlooked in initial planning, plays a pivotal role in preserving this investment. Regular care using appropriate floor maintenance techniques—such as avoiding excessive moisture and using pH-neutral cleaners—can prevent warping or scratches. For example, a homeowner in Austin, Texas, reported extending the life of their oak floors by 20 years through diligent maintenance, including annual professional refinishing.
This proactive approach not only safeguards the investment but also reinforces the flooring’s role as a low-maintenance, high-value feature. Beyond financial metrics, hardwood flooring contributes to a home’s emotional and functional value. Its natural warmth and sound-dampening properties create a comfortable living environment, a benefit highlighted in a 2021 survey by the American Society of Interior Designers, where 68% of respondents cited hardwood as their preferred flooring for its ability to enhance daily comfort. For DIYers, this translates to a rewarding project that delivers both tangible and intangible returns. As trends continue to favor sustainable and versatile materials, hardwood flooring remains a cornerstone of home improvement, offering a blend of practicality, style, and enduring value that aligns with the goals of both seasoned DIYers and first-time renovators.