Hardwood Floor SOS: A DIY Troubleshooting Guide for Scratches, Dents, and Water Damage
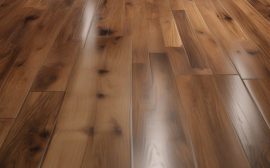
Hardwood floors: they’re the epitome of timeless elegance, adding warmth and value to any home. But life happens. Scratches appear, dents materialize, and the dreaded water damage rears its ugly head. Before you resign yourself to costly professional repairs or, worse, replacement, take heart! This comprehensive guide is your SOS call for distressed hardwood, providing actionable DIY solutions to restore your floors to their former glory. We’ll walk you through identifying the damage, gathering the right tools, and executing the repair like a seasoned pro.
From minor blemishes to more significant issues, we’ll empower you to tackle hardwood floor repair with confidence. Think of it as a before-and-after transformation, right in your own home. This DIY guide is tailored for the homeowner who appreciates the beauty of hardwood but also values the satisfaction of hands-on home improvement. We understand that professional floor refinishing can be a significant expense, often running into the thousands of dollars depending on the square footage and complexity of the job.
Our aim is to equip you with the knowledge and techniques to address common problems like wood floor scratches, wood floor dents, and minor water damage restoration without breaking the bank. By mastering these DIY floor repair methods, you’ll not only save money but also gain a deeper understanding of your home’s construction and maintenance needs. Beyond the immediate cost savings, learning basic hardwood floor care and repair techniques empowers you to maintain your floors’ beauty and longevity.
Regular wood floor maintenance, including scratch removal and addressing minor issues promptly, prevents them from escalating into larger, more expensive problems. Think of it as preventative medicine for your floors. This guide will also touch upon preventative measures, such as using the right cleaning products and employing strategies to minimize future damage. By adopting a proactive approach, you can significantly extend the life of your hardwood floors and preserve their value for years to come.
Whether you’re dealing with a few unsightly wood floor scratches from a playful pet, a noticeable dent caused by dropped object, or the aftermath of a minor water spill, this guide provides the step-by-step instructions you need. We’ll cover everything from selecting the appropriate wood filler and stain to matching the existing finish for seamless repairs. You’ll also learn about the tools and materials that make hardwood floor repair more efficient and effective, such as orbital sanders, specialized wood cleaners, and touch-up markers designed for hardwood floors. With a little patience and the right techniques, you can achieve professional-quality results and restore the beauty of your hardwood floors.
Identifying the Damage: Knowing Your Enemy
Before diving into repairs, it’s crucial to identify the type of damage you’re dealing with. This will dictate the best course of action and the necessary tools. Here’s a breakdown: Light Scratches: These are surface-level imperfections that haven’t penetrated the finish. Often caused by pet claws, furniture movement, or everyday foot traffic. Addressing these promptly with appropriate wood floor maintenance techniques is key to preventing further damage. A simple scratch removal process might involve a specialized hardwood floor repair kit, readily available at most home improvement stores.
Ignoring these minor blemishes can lead to a gradual dulling of the floor’s finish, necessitating more extensive floor refinishing down the line. Deep Scratches: These scratches extend beyond the finish and into the wood itself. They’re more noticeable and require a more involved repair. Successful DIY floor repair for deep scratches often involves carefully sanding the affected area, applying a wood filler that matches the floor’s color, and then refinishing to blend seamlessly with the surrounding surface.
The depth of the scratch determines the grit of sandpaper required, starting with a coarser grit for deeper imperfections and progressing to finer grits for a smooth finish. Consulting with a flooring specialist might be wise for valuable insights before attempting such repairs. Surface Dents: These are shallow indentations that haven’t compressed the wood fibers significantly. They often appear as slight depressions in the finish. Sometimes, moisture and heat can be used to raise the wood fibers back to their original level.
A damp cloth and a hot iron, carefully applied, can often eliminate these surface dents. However, caution is advised to avoid scorching the wood or damaging the surrounding finish. For persistent dents, a specialized wood filler designed for dent repair may be necessary. Impact Dents: These dents are deeper and more pronounced, usually caused by heavy objects being dropped or dragged across the floor. The wood fibers are compressed and may be visibly damaged. These often require a more aggressive approach, potentially involving steaming the wood to raise the fibers or using a wood filler to restore the surface to its original level.
Color-matching the filler to the existing wood is crucial for a seamless repair. For significant impact dents, professional hardwood floor repair might be the most effective solution. Minor Water Damage: This involves small spills or leaks that are quickly addressed. The damage is usually limited to surface staining or slight warping. Immediate action is crucial in mitigating minor water damage. Thoroughly drying the affected area and monitoring for any signs of warping or discoloration is essential.
Applying a wood cleaner specifically designed for hardwood floors can help remove any residual staining. Proper hardwood floor care includes promptly addressing spills to prevent long-term damage. Significant Water Damage: This results from prolonged exposure to water, leading to cupping, crowning, or even rot. This type of damage often requires professional intervention. Significant water damage compromises the structural integrity of the flooring and can lead to mold growth. Water damage restoration in such cases often involves replacing damaged planks, addressing any underlying moisture issues, and refinishing the entire floor.
According to the National Wood Flooring Association (NWFA), timely intervention is crucial in minimizing the extent of damage and preventing costly repairs. Addressing these issues promptly can save homeowners significant expenses in the long run. Beyond these common types, understanding the age and type of finish on your hardwood floor is paramount. Older floors with shellac or varnish finishes will require different repair techniques and materials than newer floors with polyurethane finishes. Furthermore, identifying the species of wood – oak, maple, cherry, etc. – is essential for selecting the correct wood filler and stain for seamless repairs.
A misidentified wood species can result in a noticeable and unsightly repair. Resources like the Forest Products Laboratory at the USDA Forest Service offer detailed information on wood identification and properties, which can be invaluable for DIY floor repair projects. Before commencing any hardwood floor repair, it’s also advisable to conduct a small, inconspicuous test patch with your chosen repair method and materials. This allows you to assess the color match and the overall effectiveness of the repair technique without risking further damage to a prominent area of the floor.
This simple step can prevent costly mistakes and ensure a professional-looking outcome. Moreover, consider the environmental conditions in your home. High humidity levels can exacerbate water damage and affect the curing time of certain repair materials. Maintaining a stable indoor environment is a key aspect of effective wood floor maintenance. Finally, remember that while DIY floor repair can be a cost-effective solution for minor damage, it’s essential to recognize the limits of your skills and knowledge.
Attempting to repair extensive damage or tackle complex issues without the proper expertise can often lead to further problems and ultimately increase the overall cost of restoration. When in doubt, consulting with a qualified flooring professional is always the best course of action. Their expertise can ensure that the repairs are done correctly, preserving the beauty and longevity of your hardwood floors. This is especially true for issues like significant water damage or extensive areas needing scratch removal, where professional equipment and knowledge are invaluable.
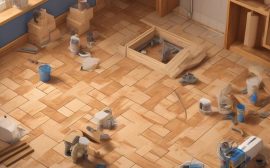
DIY Repair: Step-by-Step Instructions
Now, let’s get our hands dirty! We’ll delve into practical, step-by-step instructions for hardwood floor repair. Remember, safety first! Always wear appropriate protective gear, such as safety glasses and gloves, when sanding or working with chemicals. The success of your DIY floor repair hinges on meticulous preparation and patience. Each repair scenario demands a tailored approach, so carefully assess the damage before proceeding. **Light Scratches:** 1. **Materials:** Wood cleaner, microfiber cloth, touch-up finish (carefully matching your floor’s existing color and sheen – test in an inconspicuous area first), optional: wax filler sticks for extremely fine scratches.
2. **Instructions:** Begin by thoroughly cleaning the affected area to remove any dirt or debris that could interfere with the touch-up finish.
Apply a small amount of touch-up finish to the scratch, using a fine-tipped artist’s brush or a lint-free cotton swab for precision. Allow it to dry completely, adhering to the manufacturer’s recommended drying time. Lightly buff the area with a clean microfiber cloth, using gentle circular motions to blend the finish seamlessly with the surrounding wood. For hairline scratches, consider using a wax filler stick, applying it directly into the scratch and buffing away the excess.
**Deep Scratches:** 1. **Materials:** Sandpaper (120-grit for initial leveling, 220-grit for smoothing), wood filler (choose a color that precisely matches your floor; pre-colored fillers are often available), putty knife, touch-up finish, microfiber cloth, vacuum cleaner.
2. **Instructions:** Gently sand the scratch with 120-grit sandpaper, moving with the grain of the wood, to carefully remove any rough edges and create a shallow depression. Thoroughly vacuum the area to remove all sanding dust. Apply wood filler to the scratch, using a putty knife to smooth it out and ensure it’s level with the surrounding surface.
Allow the filler to dry completely, as per the product instructions. Sand the filled area with 220-grit sandpaper to create a smooth, even surface, again working with the grain. Clean the area meticulously and apply touch-up finish, blending it carefully with the existing finish. Buff with a microfiber cloth to achieve a uniform sheen. **Surface Dents:** 1. **Materials:** Damp cloth (cotton or terry cloth), iron (clothing iron, not a steam iron).
2. **Instructions:** Place a damp cloth, wrung out to avoid excess water, directly over the dent.
Heat the iron to a low, dry setting (no steam) and gently iron over the damp cloth in a circular motion. The steam generated by the heat will help to raise the compressed wood fibers. Repeat this process as needed, checking the progress frequently, until the dent is minimized. Allow the area to dry completely and assess if further treatment is required. This method leverages the natural pliability of wood when exposed to moisture and heat, offering a non-invasive dent repair solution.
**Impact Dents:** 1. **Materials:** Drill, small drill bit (slightly smaller than the dent’s diameter), damp cloth, iron, wood filler (optional, for deeper dents), touch-up finish (optional), syringe (for precise water application).
2. **Instructions:** Carefully drill a small hole in the center of the dent, penetrating only partially into the wood. This allows moisture to more effectively reach the compressed fibers. Using a syringe or eyedropper, carefully introduce a few drops of water into the drilled hole.
Place a damp cloth over the dent and iron as described above for surface dents. The combination of the drilled hole and direct moisture application maximizes the steam’s ability to restore the wood’s original form. If the dent remains after several attempts, you may need to use wood filler to fill any remaining imperfections. Sand, clean, and apply touch-up finish as needed to seamlessly blend the repair with the surrounding floor. **Minor Water Damage:** 1. **Materials:** Absorbent towels, dehumidifier, fans, wood cleaner specifically designed for hardwood floors, wood polish or restorer.
2. **Instructions:** Immediately dry the affected area with absorbent towels, blotting up as much standing water as possible.
Position dehumidifiers and fans strategically to remove any remaining moisture from the wood and the surrounding air. Clean the area thoroughly with a wood cleaner formulated for hardwood floors, following the manufacturer’s instructions. Once the area is completely dry, apply a wood polish or restorer to help replenish the wood’s natural oils and restore the finish. Monitor the area closely for any signs of lingering moisture or discoloration. **Significant Water Damage:** Significant water damage necessitates professional water damage restoration.
However, immediate action is crucial to mitigate further harm and potentially salvage the floor. Remove standing water promptly using towels and a wet/dry vacuum. Deploy dehumidifiers and fans to aggressively dry the affected area, focusing on airflow beneath the flooring if possible. Document the extent of the damage with photographs for insurance purposes. Contact a qualified flooring contractor specializing in water damage restoration immediately. Delaying professional intervention can lead to irreversible damage, including structural issues and mold growth, potentially necessitating complete floor refinishing or replacement. Prioritize safety by avoiding walking on severely water-damaged areas, as the structural integrity may be compromised. This situation often extends beyond a simple DIY floor repair.
Preventative Measures: An Ounce of Prevention
Prevention is always better than cure when it comes to preserving the beauty and longevity of your hardwood floors. Simple, proactive measures can significantly reduce the need for future hardwood floor repair and save you considerable time and expense. Consider these preventative measures as an investment in maintaining the value and aesthetic appeal of your home. It’s far easier to implement these strategies upfront than to deal with the aftermath of neglect, which could potentially lead to costly floor refinishing or even complete replacement.
Wood floor maintenance is an ongoing process, but one that pays dividends in the long run. Area rugs are your first line of defense, particularly in high-traffic zones. Place rugs strategically in hallways to cushion foot traffic, in entryways to trap dirt and debris carried in from outside, and in living rooms to protect against furniture movement. Opt for rugs with non-slip pads underneath to prevent them from sliding and causing further abrasion. Beyond aesthetics, rugs act as a sacrificial layer, absorbing the brunt of daily wear and tear.
The initial cost of a good quality rug is minimal compared to the potential expense of addressing widespread wood floor scratches. This simple step can drastically reduce the need for future scratch removal efforts. Furniture pads are another essential element of proactive hardwood floor care. Affix felt pads to the legs of all furniture, including chairs, tables, sofas, and beds. These pads create a buffer between the furniture and the floor, preventing scratches and dents caused by movement.
Periodically check and replace worn pads, as they can accumulate dirt and become abrasive themselves. For heavier items, consider using wider, more durable pads or even furniture coasters. Addressing potential damage from furniture is a key component in preventing future dent repair or more extensive water damage restoration issues. Maintaining proper humidity levels is crucial for the health of your hardwood floors. Wood expands and contracts with changes in humidity, which can lead to warping, cracking, and gapping.
Aim to keep the humidity level in your home between 30-50%. Use a humidifier during dry winter months and a dehumidifier during humid summer months to maintain this balance. Investing in a hygrometer to monitor humidity levels is a worthwhile expense. Consistent humidity control is paramount in avoiding issues that might necessitate professional DIY floor repair, especially if water damage is a concern. Finally, be mindful of your cleaning practices. Avoid harsh chemicals, abrasive cleaners, and excessive water, all of which can damage the finish and penetrate the wood. Use only wood-specific cleaners recommended by flooring professionals. When cleaning, use a slightly damp microfiber mop to avoid saturating the floor. Wipe up spills immediately to prevent water from seeping into the wood. Consistent and careful cleaning habits are essential for long-term hardwood floor care and can significantly minimize the likelihood of needing professional intervention for water damage restoration.
When to Call a Professional & Maintenance Tips
While many hardwood floor issues can be resolved with DIY methods, there are times when calling a professional is the best course of action. Consider hiring a flooring contractor if: you’re dealing with significant water damage or rot that extends beyond the surface, potentially affecting the subfloor; the damage is extensive or covers a large area, making DIY repair impractical; you’re not comfortable performing the repairs yourself, particularly if specialized tools or techniques are required; you’re unsure of the type of finish on your floor, as using the wrong product can cause further damage; or you want to ensure a professional, long-lasting hardwood floor repair that maintains the floor’s value and appearance.
Remember, improper DIY attempts can sometimes exacerbate the problem, leading to more costly repairs down the line. A professional assessment can save time, money, and prevent further damage. They can also accurately match existing stains and finishes for a seamless repair. When dealing with extensive wood floor scratches, significant wood floor dents, or widespread water damage restoration needs, the expertise of a professional becomes even more critical. For example, deep scratches might require sanding and refinishing of the entire floor, a task best left to experienced technicians with specialized equipment.
Similarly, large dents might necessitate wood replacement, demanding precise cutting and fitting skills. And in cases of water damage, professionals can assess the extent of the damage, dry out the affected areas, and repair or replace damaged boards to prevent mold growth and structural issues. Ignoring these problems can lead to bigger issues down the line, so it’s important to address them quickly. **Extending the Life of Your Hardwood Floors:** Regular maintenance is key to keeping your hardwood floors looking their best.
Sweep or vacuum regularly to remove dirt and debris, using a soft brush attachment to avoid scratching the surface. Clean your floors with a wood-specific cleaner as needed, avoiding harsh chemicals or excessive water. Consider refinishing your floors every 7-10 years to restore their original beauty and protect them from wear and tear; this process involves sanding down the old finish and applying a new one, effectively removing surface imperfections and revitalizing the wood. Additionally, consider applying a fresh coat of polyurethane every few years to enhance the floor’s protection and sheen. Proper hardwood floor care and wood floor maintenance will ensure that your hardwood floors remain a stunning feature of your home for years to come.