You’ve tried everything. Enzyme cleaners, vinegar solutions, professional carpet cleaning machines, even those expensive “guaranteed” pet odor products from the pet store. Yet that unmistakable ammonia smell persists, especially on humid days or when the heat kicks on. If you’re reading this, you’re likely dealing with one of the most challenging problems homeowners face: pet urine that has penetrated deep into hardwood floors.
The harsh reality is that pet urine in hardwood floors isn’t just a surface problem—it’s a multi-layer disaster that can affect the finish, the wood itself, the subfloor beneath, and even the joists below that. What makes this particularly frustrating is that the damage often occurs gradually, going unnoticed until the smell becomes unbearable or visible black stains appear. By then, what started as occasional accidents has become a structural and health issue requiring serious intervention.
This guide provides the definitive approach to diagnosing, treating, and preventing pet urine damage in hardwood floors. We’ll cover everything from understanding why traditional cleaning methods fail to professional-grade restoration techniques you can do yourself, and when it’s time to admit defeat and replace boards entirely. Most importantly, you’ll learn how to prevent future damage while maintaining beautiful hardwood floors in a pet-friendly home.
Understanding the Science: Why Pet Urine Destroys Hardwood
The Chemical Composition Problem
Pet urine isn’t just water with waste—it’s a complex chemical cocktail that wages war on wood floors. Fresh urine contains urea, urochrome, uric acid, ammonia, hormones, and bacteria. When it hits your hardwood floor, it immediately begins seeping through any available pathway: microscopic cracks in the finish, gaps between boards, or areas where the finish has worn thin.
As urine dries, it undergoes chemical changes that make it increasingly destructive. Bacteria break down urea into ammonia, creating that characteristic smell. Meanwhile, uric acid crystallizes into salts that bond to wood fibers at a molecular level. These crystals are hydrophobic when dry but reactivate with any moisture—humidity, mopping, or new accidents—releasing that ammonia smell again. This is why floors that seemed clean can suddenly smell terrible on rainy days.
The pH of pet urine (typically 6.0-6.5 when fresh) becomes increasingly alkaline as it breaks down, reaching levels of 10 or higher. This alkalinity breaks down lignin, the polymer that gives wood its structure and hardness. Essentially, the urine is slowly dissolving your floor from the inside out, creating a soft, punky wood that can no longer hold finish or maintain structural integrity.
The Penetration Pattern
Understanding how deeply urine penetrates helps explain why surface treatments fail. In the first 30 minutes after an accident, urine spreads laterally across the surface while simultaneously soaking vertically into the wood. The end grain of wood acts like hundreds of tiny straws, wicking urine deep into the board. Depending on the species and cut of wood, urine can penetrate 1/4 to 1/2 inch into the board within hours.
Between boards, urine flows into the tongue-and-groove joints, creating hidden reservoirs of contamination. It continues down to the subfloor, spreading laterally across the plywood or OSB underlayment. In severe cases, it penetrates through the subfloor into floor joists, creating a three-dimensional contamination zone that can span several square feet despite starting as a small puddle.
The wood’s natural properties affect contamination patterns. Softer woods like pine absorb urine quickly and deeply. Harder woods like oak resist initial penetration but develop deep cracks along grain lines where urine concentrates. The finish type matters too—older shellac or wax finishes provide minimal protection, while modern polyurethane slows but doesn’t prevent penetration.
Diagnosis: Determining the Extent of Damage
Visual Inspection Techniques
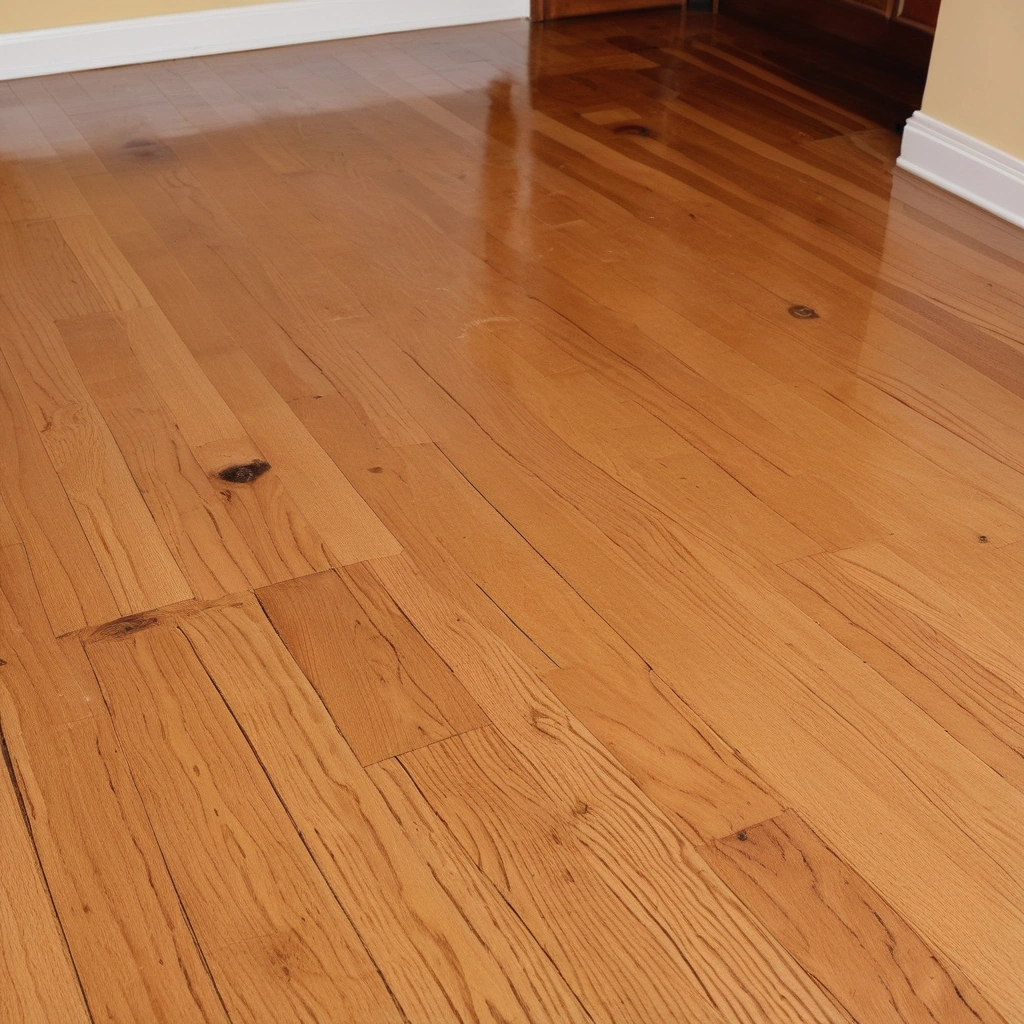
Start your inspection in natural daylight, as artificial light can hide discoloration. Look for black or dark grey stains, which indicate repeated contamination where uric acid has reacted with tannins in the wood. These stains often appear at board edges where urine accumulated. Lightened or bleached areas suggest finish damage from urine’s alkalinity. White crystalline deposits around board gaps indicate dried uric acid salts.
Check for finish deterioration—cloudy, rough, or flaking polyurethane shows chemical breakdown. Cupped or crowned boards suggest moisture damage from repeated wetting. Pay special attention to room corners, areas near doors, and spots along walls where pets typically mark. These zones often show damage patterns extending 18-24 inches from walls.
Run your hand over suspected areas feeling for raised grain or roughness indicating finish failure. Press firmly on stained areas—soft, spongy wood indicates severe degradation requiring board replacement. Use a bright flashlight held at a low angle to reveal subtle surface irregularities that indicate contamination zones.
Black Light Detection
A UV black light is your most powerful diagnostic tool for finding all contamination, including old, dried urine invisible to the naked eye. Pet urine glows yellowish-green to yellow under UV light, with intensity indicating concentration. Fresh urine glows brighter than old, but even years-old contamination remains visible.
For accurate detection, darken the room completely—even small amounts of ambient light reduce effectiveness. Hold the light 1-2 feet from the floor, scanning slowly. Mark all glowing areas with painter’s tape, as they’re hard to relocate in normal light. Note that some cleaning products and wood finishes also fluoresce, so correlate UV findings with smell and visual signs.
Document your findings with a smartphone camera—most phones can capture UV fluorescence. This creates a contamination map guiding your treatment strategy and helping track progress. Professional-grade UV lights (365-385 nanometer wavelength) work better than cheap LED alternatives.
Moisture and Odor Mapping
Use a moisture meter to identify areas where urine has penetrated deeply or where repeated accidents have occurred. Readings above 12% in hardwood indicate problematic moisture levels. Compare readings between contaminated and clean areas to understand penetration depth. Pin-type meters can check moisture at different depths by adjusting pin penetration.
Create an odor map by closing the room overnight, then noting smell intensity in different areas the next morning. Have someone unfamiliar with the space help, as you may have become nose-blind to the odor. Mark intensity on a scale of 1-10 on your floor plan. This helps prioritize treatment areas and verify effectiveness after treatment.
Treatment Options: From Light to Nuclear
Surface-Level Treatment (Minimal Damage)
For recent accidents or light surface contamination where urine hasn’t penetrated deeply, aggressive surface treatment might suffice. Start by sanding affected areas with 120-grit sandpaper to remove the contaminated finish and top layer of wood. This opens wood pores for treatment penetration. Vacuum thoroughly—don’t use water yet as it reactivates uric acid crystals.
Apply a commercial enzyme cleaner specifically designed for pet urine, not general pet odor products. Enzyme cleaners contain bacteria that produce enzymes to break down uric acid crystals. Saturate the wood, allowing pudding on the surface for maximum penetration. Keep the area wet with enzyme solution for 24 hours, reapplying as needed. The bacteria need moisture to remain active and digest urine components.
After enzyme treatment, rinse with clean water and extract using a wet vacuum. Allow complete drying (3-5 days), then reassess. If odor persists, repeat the enzyme treatment. Success requires the enzyme solution to penetrate as deeply as the urine. Once odor-free and dry, sand smooth with 220-grit paper and apply matching finish coats.
Deep Treatment with Hydrogen Peroxide
For moderate contamination with visible staining but intact wood structure, hydrogen peroxide treatment can neutralize odor and lighten stains. This method works by oxidizing urine components and breaking down odor-causing compounds. Use 30-35% hydrogen peroxide (not drugstore 3%)—this requires careful handling with gloves and eye protection.
Sand the affected area to bare wood using 80-grit paper, removing all finish. Soak clean rags in hydrogen peroxide and lay them over stained areas. Cover with plastic sheeting to slow evaporation and maintain contact. For deep stains, let sit 4-8 hours, checking hourly. The wood will lighten significantly—sometimes too much, requiring staining to match surrounding floors.
The chemical reaction generates heat and oxygen bubbles, indicating active oxidation. Once bubbling stops, remove rags and rinse with water. The treatment may need repeating for severe stains. After final treatment and drying, neutralize any peroxide residue with a vinegar solution before refinishing. This method often succeeds where enzyme cleaners fail but requires more skill to achieve even results.
The Restoration Professional’s Secret: Oxalic Acid
Professional floor refinishers often turn to oxalic acid (wood bleach) for severe urine stains. This powerful treatment can remove stains that penetrate deep into wood fibers. Oxalic acid works by breaking down the iron compounds that create black stains and neutralizing alkaline urine residues. It’s particularly effective on oak floors where urine has reacted with tannins.
Mix oxalic acid crystals with water (typically 4-6 ounces per gallon) in a non-metallic container. After sanding to bare wood, apply solution liberally with a synthetic brush or mop. Let dwell for 30-60 minutes—you’ll see stains lightening before your eyes. For stubborn stains, make a paste with less water and let sit overnight under plastic. Multiple applications might be necessary for complete stain removal.
Neutralize thoroughly with baking soda solution (2 tablespoons per gallon of water) after treatment. This step is crucial—residual acid will prevent finish adhesion and continue eating wood fibers. Rinse with clean water and allow complete drying. The treated area will likely be lighter than surrounding wood, requiring staining to match. Always use appropriate safety equipment—oxalic acid is toxic and can cause burns.
Subfloor Treatment When Surface Treatment Fails
When urine has penetrated through hardwood into the subfloor, surface treatment alone won’t eliminate odor. You’ll need to treat or replace the subfloor material. For accessible subfloors, drill small holes through the hardwood at board joints to inject enzyme cleaner directly into contaminated subfloor areas. Use a syringe or squeeze bottle for controlled application.
If removing hardwood boards, treat exposed subfloor with enzyme cleaner, then seal with oil-based primer-sealer designed to block odors. Products like KILZ Restoration or Zinsser BIN create an impermeable barrier preventing odor molecules from escaping. Apply two coats, extending coverage 12 inches beyond visible contamination. Some professionals add a thin aluminum vapor barrier for extra protection.
For severe subfloor contamination, cutting out and replacing affected sections might be necessary. Mark the contamination area, adding 6 inches on all sides. Cut along joist centers for proper support. Replace with matching thickness plywood, sealing all edges and surfaces before installing hardwood above.
The Nuclear Option: Board Replacement
When Replacement Is Necessary
Board replacement becomes necessary when wood is structurally compromised (soft, punky texture), stains remain after multiple bleaching attempts, odor persists despite repeated treatments, or contamination extends through to the subfloor. Don’t waste time and money treating wood that’s too damaged—replacement is often faster and more cost-effective for severe damage.
Replacement Technique
Removing tongue-and-groove boards requires careful technique to avoid damaging surrounding floors. Use a circular saw set to the floor thickness, cutting lengthwise down the center of boards to be removed. Make relief cuts every 12 inches crossing the length cuts. This creates removable sections without damaging adjacent board tongues.
Use a pry bar and hammer to remove cut sections, working from the center outward. Clean out all debris from the cavity, treating exposed subfloor as described earlier. If replacing multiple boards, number them to maintain grain pattern. New boards might need their bottom groove removed to fit over existing tongues—use a table saw or chisel for this modification.
For color matching, source boards from the same species and grade. Older floors might require reclaimed wood for proper match. Install new boards with construction adhesive and face-nail with finish nails, setting heads below surface. Fill holes with matching wood putty. Sand and finish to blend with existing floor—this often requires refinishing a larger area for seamless appearance.
Prevention: Protecting Your Investment
Immediate Response Protocol
The key to preventing permanent damage is immediate action when accidents occur. Keep a pet accident kit readily accessible containing paper towels, enzyme cleaner, plastic sheeting, and a wet vacuum. Blot—don’t wipe—fresh urine to prevent spreading. Apply enzyme cleaner immediately, even if you plan deeper cleaning later.
For recurring accident spots, place waterproof mats or pads that can be easily cleaned or replaced. Consider motion-activated deterrent devices in problem areas. Some pet owners successfully use aluminum foil or double-sided tape as temporary deterrents while retraining pets.
Protective Coatings and Sealers
Apply extra finish coats in pet areas for added protection. Modern aluminum oxide finishes provide superior chemical resistance compared to standard polyurethane. Consider having high-traffic pet areas professionally refinished with commercial-grade catalyzed finishes offering maximum durability.
Some homeowners apply liquid rubber or epoxy coatings in extreme problem areas, creating completely impermeable surfaces. While this changes the floor’s appearance, it provides absolute protection. These coatings can be removed later if needed, preserving the wood underneath.
Behavioral Solutions
Address the root cause—why pets are having accidents. Medical issues like UTIs or diabetes increase accident frequency. Anxiety, territorial marking, or inadequate house training require different interventions. Consult veterinarians or animal behaviorists for persistent problems.
Enzymatic cleaners must be pet-safe but truly effective. Many retail products don’t contain sufficient enzyme concentration. Professional-grade products from janitorial suppliers work better. Maintain multiple litter boxes for cats (one per cat plus one extra) and ensure dogs have adequate outdoor access.
Cost Analysis: DIY vs. Professional Restoration
DIY Treatment Costs
Basic enzyme treatment costs $30-60 for quality products treating 100 square feet. Add $20-40 for sanders, brushes, and safety equipment. Hydrogen peroxide treatment runs $40-80 including safety gear. Oxalic acid treatment costs $30-50 plus neutralizers. Refinishing supplies add $50-100 for small areas. Total DIY costs range from $100-300 for moderate damage.
Professional Restoration Costs
Professional pet damage restoration typically costs $4-8 per square foot for sand, treat, and refinish. Severe damage requiring board replacement runs $8-15 per square foot. Whole-room restoration (200 square feet) costs $800-3,000 depending on damage severity. Professionals bring industrial equipment, experience identifying hidden damage, and warranties on odor elimination.
Making the Right Choice
DIY makes sense for recent damage, small affected areas (under 50 square feet), and when you have time for potentially multiple treatment attempts. Choose professional restoration for extensive damage, valuable or historic floors, when selling your home, or after failed DIY attempts. Professionals complete work faster with less disruption and guarantee results.
Conclusion: Reclaiming Your Floors and Your Sanity
Pet urine damage in hardwood floors feels overwhelming, but it’s a solvable problem with the right approach. Success requires understanding the contamination extent, choosing appropriate treatment intensity, executing treatment properly, and preventing future damage. Don’t let embarrassment prevent you from seeking help—this is a common problem that flooring professionals handle regularly.
Start with the least invasive treatment appropriate for your damage level. Be patient—severe odor might require multiple treatments over several weeks. Document your process for insurance claims or professional consultation. Remember that some damage genuinely requires replacement—knowing when to stop treating and start replacing saves time, money, and frustration.
Most importantly, address underlying behavioral issues to prevent recurrence. Beautiful hardwood floors and beloved pets can coexist with proper prevention strategies and quick accident response. Your floors can be restored, and with the knowledge from this guide, you’re equipped to tackle even severe pet damage successfully.
Whether you’re dealing with a single accident or years of damage, don’t give up on your hardwood floors. They’re worth saving, and now you know exactly how to do it.


