Introduction: Embrace the Challenge of DIY Hardwood Floors
Hardwood floors: they evoke a sense of timeless elegance, adding warmth and value to any home, instantly elevating the aesthetic of any space. The allure of genuine wood flooring lies not only in its visual appeal but also in its durability and potential longevity, making it a worthwhile investment for any homeowner. While professional flooring installation guarantees a flawless finish, ensuring precise cuts and a perfectly level surface, the associated costs can be substantial, often comprising a significant portion of a home improvement budget.
These costs encompass not only labor but also material markups and potential unforeseen expenses, making DIY hardwood floor installation an increasingly attractive alternative. For the ambitious homeowner with a penchant for DIY projects, installing hardwood flooring is a challenging but incredibly rewarding project, offering a sense of accomplishment and significant cost savings. DIY hardwood floor installation presents a unique opportunity to personalize your living space while gaining valuable home improvement skills. Before embarking on this journey, it’s essential to understand the nuances of wood flooring, including the differences between solid hardwood and engineered hardwood, as well as the various installation methods available.
Solid hardwood, prized for its timeless beauty and potential for refinishing, offers a classic look, while engineered hardwood provides enhanced stability and moisture resistance, making it suitable for a wider range of environments. Careful consideration of these factors, along with thorough subfloor preparation, is paramount to achieving a successful and long-lasting result. Selecting the right materials and understanding the intricacies of nail-down installation, glue-down installation, or even opting for a floating floor system are critical decisions that will influence the final outcome.
This comprehensive guide will equip you with the knowledge and confidence to tackle this project, transforming your space and saving money in the process, empowering you to take control of your home improvement endeavors. We’ll cover everything from selecting the right type of wood flooring and ensuring proper subfloor preparation to mastering the installation techniques and understanding hardwood floor maintenance, ensuring a beautiful and long-lasting result. By demystifying the process and providing step-by-step instructions, this guide aims to empower homeowners to confidently undertake their own flooring installation, adding value and character to their homes. Furthermore, we will delve into troubleshooting common problems that may arise during the installation process, offering practical solutions to ensure a smooth and successful project, turning your vision of stunning wood flooring into a tangible reality.
Subfloor Preparation: The Foundation for Success
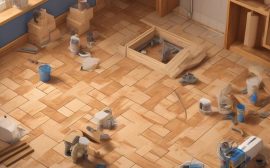
Before even thinking about hardwood flooring, meticulous subfloor preparation demands your unwavering attention. This is the bedrock upon which your beautiful new floor will rest, and any compromise here will manifest as problems down the line. As any seasoned home improvement enthusiast knows, shortcuts in foundational work invariably lead to costly repairs. First, conduct a thorough moisture test. Excess moisture is hardwood’s, whether solid hardwood or engineered hardwood, greatest nemesis, leading to warping, buckling, and ultimately, a failed DIY hardwood floor installation.
Rent a reliable moisture meter from your local hardware store – investing in your own is wise if you anticipate future flooring projects – and check multiple spots across the subfloor, paying particular attention to areas near exterior walls and plumbing. Readings should be within the hardwood manufacturer’s stringent recommended range, typically below 12%. If moisture levels exceed this threshold, identify and address the source of the dampness before proceeding with any flooring installation. Ignoring this critical step is a recipe for disaster.
Next, meticulously check for levelness. Unevenness in the subfloor will translate into an uneven hardwood floor, creating tripping hazards and aesthetic imperfections. Employ a long level (at least 6 feet, ideally 8 or 10) to identify any dips, humps, or undulations. Minor imperfections (less than 1/8 inch over 6 feet) can often be remedied with self-leveling compound, a readily available product in the flooring installation aisle of most home improvement stores. For more significant discrepancies, however, more extensive subfloor repair or even partial replacement may be necessary.
Consider consulting with a flooring professional if you encounter substantial unevenness; their expertise can save you time and money in the long run. Remember, the goal is to create a perfectly flat and stable surface for your new wood flooring. Finally, ensure the subfloor is scrupulously clean, dry, and entirely free of debris. Remove any remnants of old flooring – carpet, vinyl, tile – along with any lingering nails, staples, or adhesive residue. A thorough vacuuming, followed by a careful scraping with a wide-blade tool, is essential.
Any remaining debris can interfere with proper adhesion in glue-down installation methods or create pressure points in nail-down installation or floating floor scenarios. This is also the time to inspect for any signs of mold or mildew, addressing them promptly with appropriate cleaning solutions. Proper subfloor preparation isn’t just about ensuring a beautiful floor; it’s about safeguarding your investment and ensuring the longevity of your hardwood flooring. Regular hardwood floor maintenance will be much easier with a properly prepared subfloor. Choosing the right installation technique, whether nail-down installation, glue-down installation, or a floating floor, also depends on the quality of your subfloor.
Choosing the Right Hardwood: Solid vs. Engineered, Species Considerations
The hardwood aisle can feel like a labyrinth for those embarking on DIY hardwood floor installation, but understanding the nuances between different types of wood flooring is paramount. Solid hardwood, crafted from a single piece of wood, presents a timeless aesthetic and the valuable option of refinishing multiple times, extending its lifespan considerably. This makes it a potentially more sustainable choice in the long run, despite the higher initial cost. However, its inherent susceptibility to moisture fluctuations makes it unsuitable for below-grade installations like basements or areas prone to high humidity.
Before committing to solid hardwood, meticulously assess your subfloor preparation and the ambient moisture levels in your home to avoid costly future problems. Remember that proper acclimation of solid hardwood to your home’s environment is crucial before installation to minimize expansion and contraction issues. Engineered hardwood offers a compelling alternative, particularly in environments where moisture is a concern. Constructed from multiple layers of wood veneer bonded together, engineered hardwood boasts enhanced dimensional stability, making it less prone to warping or buckling in response to humidity changes.
This allows for its installation in a wider range of environments, including basements and over concrete slabs, expanding the possibilities for wood flooring throughout your home. Furthermore, engineered hardwood often comes prefinished, simplifying the installation process and reducing the mess and time associated with sanding and finishing solid hardwood floors. When considering engineered options, pay close attention to the thickness of the top veneer layer, as this determines how many times the floor can be refinished.
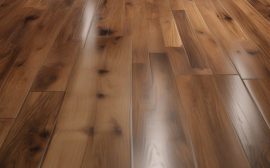
Beyond the fundamental choice between solid and engineered hardwood, selecting the right species is equally crucial. Oak, a perennial favorite, strikes a balance between durability, affordability, and availability. Maple, renowned for its hardness and resistance to dents, is an excellent choice for high-traffic areas, though its subtle grain pattern may not appeal to all tastes. Hickory stands out as the hardest domestic hardwood, making it exceptionally well-suited for active households. Exotic species, such as Brazilian cherry or tigerwood, introduce unique colors and grain patterns, adding a touch of luxury and individuality to your home.
However, be mindful of the sustainability and ethical sourcing of exotic woods, as well as their potentially higher cost and increased difficulty of repair. Regardless of your choice, remember that proper hardwood floor maintenance will extend the life and beauty of your investment. Finally, consider the impact of color and style on your overall home aesthetic. Lighter wood tones can visually expand a room, creating an airy and brighter ambiance, while darker shades infuse warmth and sophistication.
Gray-toned wood flooring has gained popularity for its modern and versatile appeal, complementing a wide range of decor styles. Ultimately, the best choice depends on your personal preferences, existing decor, and the desired mood you wish to create in your space. When planning your flooring installation, remember to factor in the installation method – whether nail-down installation, glue-down installation, or a floating floor – as this can influence the type of hardwood you select and the complexity of the DIY hardwood floor installation process.
Tools and Materials: Setting Yourself Up for Success
Gathering the right tools and materials is crucial for a smooth DIY hardwood floor installation. Beyond the basics, selecting quality tools can significantly impact the final result and ease the installation process. A high-quality moisture meter is paramount for accurate subfloor preparation, ensuring the wood flooring won’t suffer from moisture-related issues down the line. Investing in a laser level, rather than a traditional bubble level, can save time and improve accuracy, especially in larger rooms.
When it comes to cutting, a miter saw offers precise angle cuts for trim work, while a circular saw is essential for straight cuts on planks. Don’t underestimate the importance of comfortable knee pads; you’ll be spending a lot of time on the floor. Remember to factor in appropriate safety glasses and a dust mask to protect yourself from flying debris and wood dust. These initial investments will pay dividends in the long run. Calculating the correct amount of hardwood flooring is essential to minimize waste and avoid costly reorders.
Start by accurately measuring the square footage of the room, paying close attention to any alcoves or irregular shapes. Add 10-15% for waste, accounting for cuts, mistakes, and unusable boards. When choosing your wood flooring, consider the installation method. For a nail-down installation, you’ll need a pneumatic nail gun and flooring nails specifically designed for hardwood. For a glue-down installation, select a high-quality wood adhesive recommended by the flooring manufacturer. If opting for a floating floor, ensure you have the appropriate underlayment to provide cushioning, sound insulation, and a moisture barrier.
The choice between solid hardwood and engineered hardwood also influences material needs; engineered hardwood is often preferred for its dimensional stability, especially in areas with fluctuating humidity. Proper subfloor preparation is key, and may involve self-leveling compounds or plywood shims. Finally, don’t overlook the finishing touches. Trim and molding are essential for creating a professional, polished look. Quarter-round molding, baseboards, and transition strips conceal expansion gaps and create a seamless transition between the new hardwood floor and adjacent surfaces.
Consider pre-finished trim to save time and effort, or opt for unfinished trim to customize the color and finish to perfectly match your hardwood flooring. Furthermore, proper hardwood floor maintenance begins even before the first plank is laid. Ensure you have the appropriate cleaning supplies and protective mats to safeguard your investment. With careful planning and the right tools and materials, your DIY hardwood floor installation project will be a resounding success, adding lasting beauty and value to your home improvement efforts.
Installation Techniques: Nail-Down, Glue-Down, Floating
There are three primary methods for installing hardwood flooring: nail-down, glue-down, and floating. Nail-down installation is the traditional approach, typically favored for solid hardwood. This involves using a nail gun to fasten the planks directly to the subfloor. The method provides a very secure and stable floor. Glue-down installation, on the other hand, is a versatile option suitable for both solid hardwood and engineered hardwood. It involves adhering the planks to the subfloor using a specialized wood adhesive.
According to the National Wood Flooring Association (NWFA), proper subfloor preparation is crucial for a successful glue-down installation, ensuring a strong bond and preventing future issues like cupping or warping. A floating floor involves interlocking the planks together without directly attaching them to the subfloor, creating a ‘floating’ surface. This method is most commonly used for engineered hardwood and offers ease of installation, making it a popular choice for DIY hardwood floor installation. Choosing the right installation technique hinges on several factors, including the type of wood flooring, the condition of the subfloor, and the homeowner’s skill level.
Nail-down installation is generally considered more demanding, requiring precision and experience with power tools. Glue-down installation requires careful attention to adhesive application and working time. The floating floor method, however, is often touted as the most DIY-friendly option, requiring less specialized tools and expertise. Regardless of the chosen method, thorough subfloor preparation is non-negotiable. Ensuring a level, clean, and dry subfloor is paramount to preventing future problems and ensuring the longevity of your hardwood floor. “Proper subfloor preparation is the single most important factor in any hardwood flooring installation,” advises Bob Vila, renowned home improvement expert.
Before commencing any DIY hardwood floor installation, acclimating the hardwood to your home’s environment is crucial. Stack the planks in the room where they will be installed for several days, allowing them to adjust to the temperature and humidity levels. This minimizes expansion and contraction after installation, preventing gaps and buckling. Furthermore, when laying out the planks, maintain consistent expansion gaps around the perimeter of the room using spacers. These gaps, typically ¼ to ½ inch, allow the wood to expand and contract naturally with seasonal changes in humidity. Neglecting these expansion gaps can lead to significant problems down the line, potentially compromising the integrity of your new wood flooring. Remember that hardwood floor maintenance begins even before the first plank is laid. Working row by row, ensure each plank is properly aligned and securely fastened, whether nailed, glued, or interlocked, to achieve a professional and lasting result for your home improvement project.
Finishing and Sealing: Protecting Your Investment
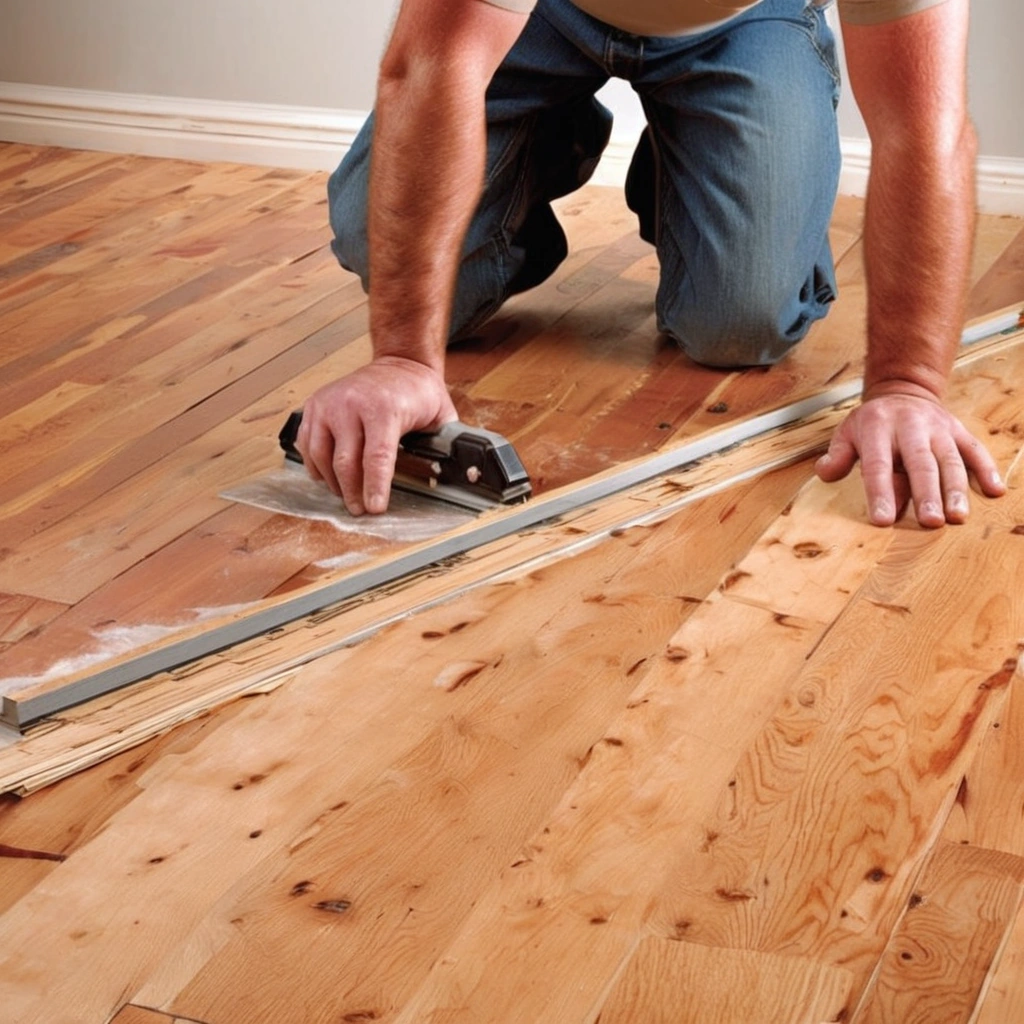
Once the DIY hardwood floor installation is complete, the finishing and sealing process is paramount to protecting your investment and ensuring long-term beauty. If you opted for unfinished hardwood flooring, meticulous sanding is the first step. Start with a coarse grit sandpaper to level any imperfections and gradually move to finer grits for a smooth, even surface. Consider renting a drum sander for larger areas, but be cautious – these machines can quickly remove material if not handled properly.
Dust collection is also crucial; use a vacuum with a HEPA filter to remove all sanding dust before applying stain or finish. This subfloor preparation step is just as important above the boards as it was below them. Choosing the right finish is equally critical. For those seeking a low-maintenance option, prefinished hardwood offers convenience, often requiring only a final coat of polyurethane for added protection and sheen enhancement. However, for unfinished floors, the options are more diverse.
Water-based polyurethanes are prized for their low VOC content, making them a more environmentally friendly choice, while oil-based finishes offer a richer, amber hue and enhanced durability, ideal for high-traffic areas. Consider the pros and cons of each in relation to your lifestyle and aesthetic preferences. Always apply multiple thin coats, allowing each coat to dry completely according to the manufacturer’s instructions, and lightly sand between coats for optimal adhesion and a flawless finish. Finally, don’t underestimate the importance of trim and molding.
These finishing touches not only enhance the aesthetic appeal of your new hardwood flooring but also serve a practical purpose by concealing the expansion gaps left around the perimeter of the room during the nail-down installation, glue-down installation, or even a floating floor installation. Choose trim that complements your flooring and décor, and install it carefully using a nail gun and wood adhesive. Regular hardwood floor maintenance, including sweeping, vacuuming, and occasional damp mopping with a pH-neutral cleaner, will help preserve the beauty and longevity of your wood flooring for years to come. Remember, proper finishing and sealing are essential elements of any successful home improvement project involving solid hardwood or engineered hardwood.
Troubleshooting and Maintenance: Ensuring Long-Term Beauty
Even with meticulous DIY hardwood floor installation, unforeseen challenges can emerge, demanding proactive solutions. Gaps between planks, a common concern, often stem from inadequate acclimation of the wood flooring to the home’s environment before installation, or subsequent fluctuations in humidity levels. Maintaining a consistent indoor environment is paramount; invest in a reliable humidifier or dehumidifier to regulate moisture, aiming for a relative humidity between 30% and 50%. Addressing these gaps promptly prevents further expansion or contraction issues that could compromise the integrity of your hardwood flooring.
Squeaks, another frequent annoyance, typically indicate movement between the subfloor and the hardwood. This can arise from loose subflooring, improperly secured planks during nail-down installation, or even debris trapped beneath a floating floor. Before embarking on any flooring installation project, thorough subfloor preparation is crucial. Ensure the subfloor is level, clean, and securely fastened. For existing squeaks, consider using shims or specialized screws designed to tighten the connection between the subfloor and the joists. Addressing squeaks promptly prevents them from worsening and potentially causing damage to the wood flooring over time.
Protecting your investment in hardwood flooring also means mitigating the risk of scratches and dents. While solid hardwood offers the advantage of being refinishable, preventing damage in the first place is always preferable. Implement preventative measures such as strategically placed area rugs in high-traffic zones and felt pads beneath furniture legs. Consider the hardness rating of the wood species when selecting your hardwood; harder species like Brazilian Cherry or Hickory are more resistant to dents than softer options like American Cherry.
Regular hardwood floor maintenance, including sweeping or vacuuming to remove abrasive particles, is essential for preserving the floor’s surface. For engineered hardwood, which typically has a thinner veneer layer, preventative care is even more crucial to extend its lifespan and maintain its aesthetic appeal. Clean spills immediately and avoid harsh chemicals that can damage the finish. With careful attention and proactive maintenance, your DIY hardwood floor will retain its beauty and value for decades to come.