Reclaiming Elegance: A DIY Guide to Hardwood Floor Refinishing
Hardwood floors, a timeless emblem of elegance and durability, often bear the brunt of daily life. Scratches, dents, and the dulling effects of time can diminish their luster, transforming a once-pristine surface into a shadow of its former self. But before you consider the expense and disruption of replacement, know that a DIY hardwood floor refinishing project can breathe new life into your home, offering a cost-effective and deeply satisfying alternative. This comprehensive floor refinishing guide provides homeowners with intermediate DIY skills a step-by-step tutorial for restoring hardwood floors like a pro, turning a weekend project into a stunning home improvement triumph.
This isn’t merely about superficial improvements; it’s about reclaiming the inherent beauty and extending the lifespan of a valuable asset. DIY flooring projects like hardwood floor refinishing represent a significant return on investment, boosting your home’s value while allowing you to customize the aesthetic to perfectly match your interior design vision. According to a recent study by the National Association of Realtors, homes with well-maintained hardwood floors command a higher selling price and tend to sell faster than those with worn or outdated flooring.
By undertaking this wood floor restoration, you’re not just improving your living space; you’re making a smart financial decision. We’ll delve into every facet of the process, from meticulously assessing damage and gathering the right woodworking tools to mastering the nuanced art of sanding hardwood floors, achieving flawless staining techniques, and ensuring lasting protection through proper polyurethane application. The goal is to empower you with the knowledge and confidence to achieve professional-quality results, all while prioritizing safety and minimizing potential pitfalls. More than just a set of instructions, this is a comprehensive floor refinishing guide designed to transform your understanding of floor maintenance and unlock the potential within your existing hardwood.
Assessing Damage and Gathering Your Arsenal
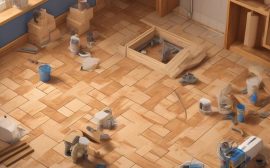
Before embarking on this transformative journey of hardwood floor refinishing, a meticulous assessment of the existing damage is paramount. Begin by thoroughly inspecting your floors under bright, direct lighting. Scratches are typically superficial, affecting only the finish, and can be readily addressed through sanding. Dents, particularly those resulting from dropped objects or heavy furniture, may necessitate the application of wood filler to create a smooth, even surface. More concerning are signs of moisture damage, such as cupping (where board edges rise above the center) or crowning (the opposite effect), indicating underlying issues that must be rectified before proceeding with any DIY flooring or wood floor restoration project.
Excessive gaps between boards can similarly signal humidity fluctuations that require attention. According to the National Wood Flooring Association (NWFA), maintaining consistent humidity levels between 30% and 50% is crucial for preventing such issues. If you observe severe warping, rot, evidence of pest infestation (termites or carpenter ants), or widespread damage affecting more than 25% of the floor’s surface area, it’s prudent to consult with a qualified flooring professional. In such cases, complete replacement may be a more cost-effective and structurally sound solution than attempting to salvage irreparably damaged hardwood.
Assuming your assessment confirms that your floors are structurally sound and suitable for refinishing, the next crucial step involves assembling your arsenal of tools and materials. This undertaking extends beyond a simple shopping trip; it’s about equipping yourself for a successful wood floor restoration. Essential equipment includes a drum sander (typically a rental item from a reputable tool supplier), an edge sander for reaching perimeter areas and tight corners, and an orbital sander for fine-tuning and blending.
Invest in a variety of sandpaper grits, ranging from coarse (36 or 40 grit) for initial finish removal to medium (60 and 80 grit) for smoothing, and fine (100, 120, and potentially higher) grits for achieving a glass-smooth surface before staining or polyurethane application. Safety is paramount: always wear safety glasses, a properly fitted dust mask or respirator (rated N95 or higher), and ear protection to mitigate the risks associated with sanding hardwood floors. A high-quality shop vacuum equipped with a HEPA filter is indispensable for thorough dust removal between sanding passes.
Knee pads are highly recommended for enhanced comfort during the often-prolonged sanding process. Beyond the basic tools, selecting the right finishing products is crucial for achieving professional-quality results in your home improvement endeavor. For wood filler, choose a product that is specifically designed for wood floors and that accepts stain evenly. When selecting a stain (optional, but highly recommended for enhancing the wood’s natural beauty or altering its color), opt for a high-quality oil-based or water-based stain from a reputable manufacturer such as Minwax, Varathane, or Bona.
Always test the stain on an inconspicuous area of the floor or on a sample piece of wood to ensure you are satisfied with the color before applying it to the entire floor. The final layer of protection comes from polyurethane, available in both oil-based and water-based formulations. Oil-based polyurethane offers exceptional durability and a warm amber hue, but it has a strong odor and longer drying time. Water-based polyurethane is low-VOC, dries quickly, and maintains a clear finish, but it may not be as durable as its oil-based counterpart. Finally, gather applicators: high-density foam rollers or applicator pads for even polyurethane application, and brushes for detailed work. Remember that proper floor maintenance after refinishing will greatly extend the life and beauty of your newly restored hardwood floors. Following this floor refinishing guide meticulously will help ensure a successful and satisfying woodworking project.
Mastering the Art of Sanding: A Step-by-Step Guide
Sanding is indeed the heart of the hardwood floor refinishing process, a stage that demands not only patience and precision but also an understanding of woodworking principles. Selecting the correct grit sequence is paramount. Start with a coarse grit, typically 36 or 40, to effectively remove the old finish, level any imperfections, and address minor cupping. The initial sanding is aggressive, so maintaining a consistent pace is crucial to avoid uneven removal. Overlap each pass by approximately 50% to prevent unsightly ridges, which are difficult to correct later.
Remember, the goal at this stage isn’t perfection, but rather a clean slate for subsequent, finer grits. Vacuum meticulously after each pass; residual grit can compromise the next sanding stage and create unwanted scratches. Progress systematically through the grit sequence, typically moving to 60, then 80, and finally 100 or 120 for the final smoothing. Each grit refines the surface, removing the scratches left by the previous, coarser grit. Vacuuming between each grit is non-negotiable.
Pay particular attention to the edges of the room, where a drum sander can’t reach. An edge sander, carefully operated, blends these areas seamlessly with the main field. For corners and other hard-to-reach spots, rely on hand-sanding with a sanding block, ensuring a consistent finish. Achieving a uniformly smooth surface, free of imperfections, is the ultimate objective before moving on to staining wood floors or applying a clear finish. This is where the artistry of wood floor restoration truly shines.
Expert flooring contractors often emphasize the critical importance of proper drum sander technique. A cardinal rule is to never stop the sander while it’s in contact with the floor; this invariably leads to deep, unsightly gouges that require extensive repair. Always lift the drum before changing direction or pausing. Rushing the sanding process is a common pitfall for DIY flooring enthusiasts. It’s tempting to skip grits or move too quickly, but this inevitably results in a subpar finish.
Invest the time to ensure each grit effectively removes the scratches from its predecessor. Visual aids, such as online tutorials demonstrating proper sanding techniques, can be invaluable for the DIYer. While a drum sander is suitable for many DIY hardwood floor refinishing projects, consider a three-disc sander for larger areas or when striving for an exceptionally even finish. Ultimately, the success of your DIY flooring project hinges on the quality and care invested in sanding hardwood floors, setting the stage for a beautiful and durable floor. This meticulous preparation ensures optimal adhesion and appearance for both staining wood floors and subsequent polyurethane application, contributing significantly to the overall home improvement and interior design aesthetic. Regular floor maintenance following the project will ensure lasting beauty.
Staining Techniques: Color Selection and Application
Staining is an optional yet transformative step in hardwood floor refinishing, offering a chance to customize the color and character of your floors. Before committing to a full application, it’s imperative to test the stain on an inconspicuous area, such as a closet floor or under a piece of furniture. This allows you to assess the color’s appearance under your specific lighting conditions and against your existing décor. Apply the stain evenly using a brush, roller, or cloth, meticulously following the manufacturer’s instructions regarding application techniques and safety precautions.
Allow the stain to penetrate the wood for the recommended time, typically a few minutes, before wiping off any excess with a clean, lint-free cloth. Remember, the duration the stain remains on the wood directly influences the final color intensity; longer exposure results in a darker, richer hue. This step is crucial in DIY flooring projects, as it sets the aesthetic tone for the entire room. Achieving uniform color coverage is paramount for a professional-looking wood floor restoration.
Uneven application, characterized by overlapping strokes or pooling stain, can lead to unsightly dark blotches and an amateurish finish. To mitigate this, work in manageable sections, blending each area meticulously to ensure a seamless transition. Consider using a pre-stain wood conditioner, particularly on softwood species like pine or fir, which are prone to uneven stain absorption. A wood conditioner helps to equalize the wood’s porosity, promoting a more consistent and predictable color outcome. This is a pro tip often overlooked in floor refinishing guides, but it can significantly elevate the quality of your DIY project.
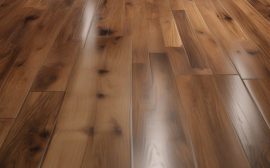
Proper preparation is key to successful staining wood floors. Color selection is a deeply personal decision, yet it should be informed by the existing interior design and lighting dynamics of your home. Lighter stains, such as natural or honey tones, can brighten a room and create a sense of spaciousness, making them ideal for smaller or darker areas. Conversely, darker stains, like walnut or ebony, can impart warmth, sophistication, and a touch of drama, complementing larger, well-lit spaces.
In the realm of home improvement, understanding these nuances is essential for achieving a cohesive and visually appealing result. The choice of stain also impacts floor maintenance; darker floors tend to show dust and scratches more readily than lighter ones. Always factor in your lifestyle and cleaning habits when making your color selection. After the staining process, patience is key. Allow the floor to dry completely before proceeding to the polyurethane application stage. This drying period typically spans 24 to 48 hours, contingent on ambient humidity and temperature levels.
Premature application of polyurethane can trap moisture, leading to clouding, adhesion problems, and ultimately, a compromised finish. Before applying the protective topcoat, lightly buff the stained floor with a fine-grit sandpaper (220-grit or higher) to create a smooth, receptive surface. This step, often recommended by woodworking experts, enhances the adhesion of the polyurethane and ensures a flawless final result. A properly stained and dried floor is the foundation for a durable and beautiful polyurethane finish, completing your hardwood floor refinishing endeavor.
Applying Polyurethane: Protection and Perfection
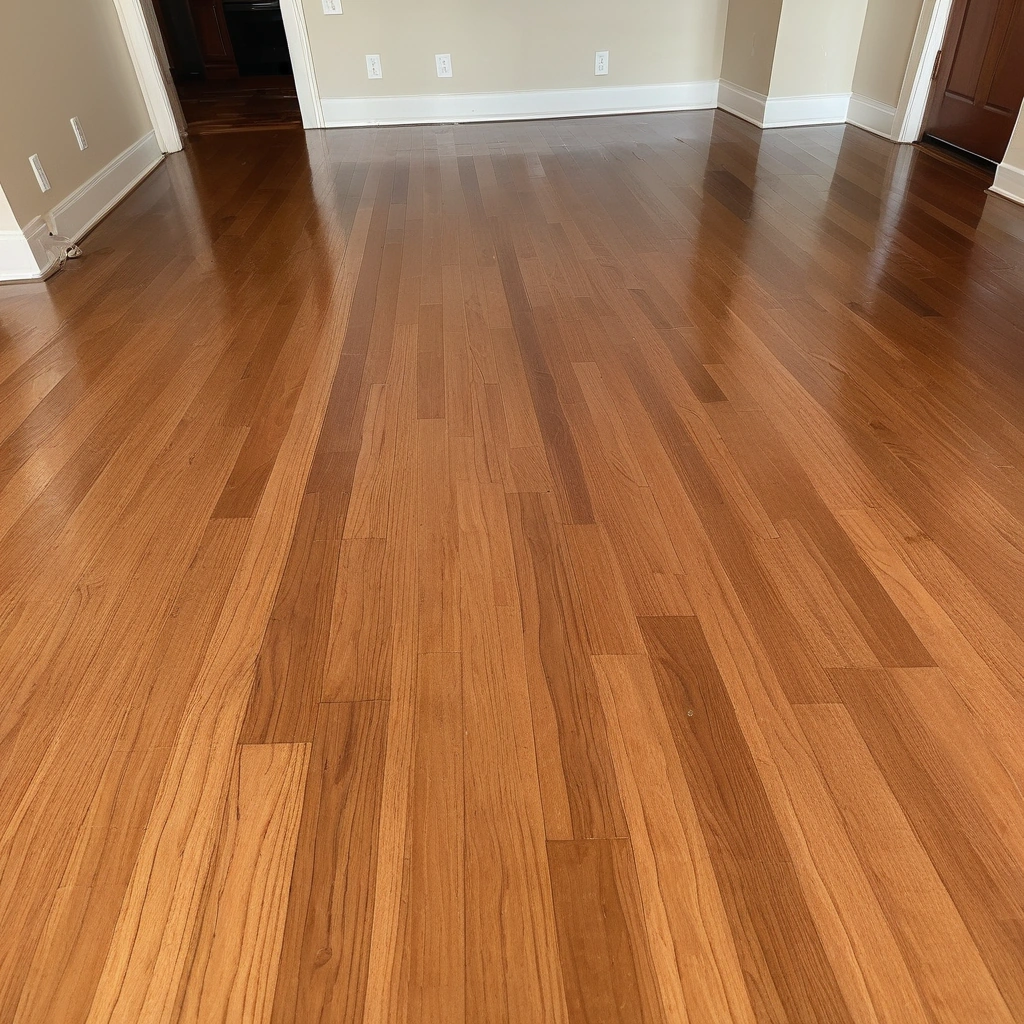
The application of polyurethane is the final act in your hardwood floor refinishing symphony, providing a durable, protective finish that not only enhances the wood’s inherent beauty but also shields it from the daily onslaught of foot traffic and potential spills. This crucial step determines the longevity and overall aesthetic appeal of your DIY flooring project. Using a high-quality paint roller or applicator pad specifically designed for polyurethane, apply the first coat meticulously, always moving in the direction of the wood grain to ensure even coverage and minimize the appearance of streaks.
Remember, a thin, even coat is paramount; avoid the temptation to apply it too thickly, as this can lead to unsightly drips and runs that will mar the final result. Allow ample drying time between coats, strictly adhering to the manufacturer’s instructions. Water-based polyurethanes typically require 4-6 hours, while oil-based formulations can demand a full 24 hours to cure properly. This patience is key to achieving a flawless finish. After the initial coat has fully dried, a critical step often overlooked is light sanding with a fine-grit sandpaper, typically around 220 grit.
This process, known as ‘de-nibbing,’ gently removes any imperfections, such as dust particles or raised grain, creating a perfectly smooth canvas for subsequent coats. Vacuum the floor thoroughly after sanding to eliminate all traces of dust – even the smallest particles can compromise the finish. Apply the second coat of polyurethane with the same care and attention to detail as the first, maintaining a consistent direction and avoiding excessive build-up. Repeat the sanding and vacuuming process after the second coat has dried completely.
For high-traffic areas, such as hallways or entryways, consider applying a third coat of polyurethane to provide an extra layer of protection against wear and tear. This small investment of time and effort will significantly extend the life of your wood floor restoration. Preventing bubbles and other finish imperfections is a common concern in DIY flooring projects, but with a few simple techniques, you can achieve professional-looking results. Avoid shaking the polyurethane can vigorously before use, as this introduces air that can become trapped in the finish.
Instead, gently stir the polyurethane with a clean stir stick. Ensure you are working in a well-ventilated area to allow the solvents in the polyurethane to evaporate properly, which helps to prevent bubbles from forming. If you do notice any bubbles appearing during application, gently brush them out immediately with a clean, high-quality brush. Investing in a premium brush designed for polyurethane application is a worthwhile expense for any serious woodworking enthusiast. It ensures a smooth, even application and minimizes the risk of brushstrokes or imperfections.
Even with meticulous preparation, troubleshooting common refinishing problems is sometimes necessary. Uneven stain absorption, for instance, can often be traced back to inadequate sanding or variations in the wood’s porosity. Addressing this requires re-sanding the affected areas to create a uniform surface. Sanding marks, those telltale swirls left by the sanding machine, can be eliminated by progressing to finer grits of sandpaper. Finish imperfections, such as drips, runs, or brushstrokes, can be carefully sanded out once the polyurethane has fully cured, followed by a spot re-coating.
Remember, patience and attention to detail are your greatest allies in achieving a flawless wood floor refinishing project. Always prioritize safety by wearing appropriate personal protective equipment, including safety glasses, a dust mask or respirator (especially when sanding), and ear protection. Work in a well-ventilated area to minimize exposure to potentially harmful fumes, and dispose of used sandpaper and rags properly to prevent fire hazards, as oil-based products can spontaneously combust. Finally, effective dust control is essential for both a clean finish and a healthy environment.
Seal off doorways and windows with plastic sheeting to contain the dust, and use a shop vacuum equipped with a HEPA filter to remove dust regularly throughout the process. By meticulously following these steps and prioritizing safety, you can successfully complete your DIY hardwood floor refinishing project, restoring your floors to their original beauty and enjoying them for years to come. This home improvement endeavor not only enhances your living space but also provides a rewarding sense of accomplishment.