DIY Hardwood Floor Repair: A Step-by-Step Guide
Hardwood floors are a prized feature in many homes, celebrated for their timeless beauty and durability. However, even the most resilient hardwood is not immune to the daily trials of a busy household. Scratches from pets, dents from dropped objects, and the occasional water spill are common occurrences that can detract from the floor’s overall appearance. This comprehensive guide is designed to empower homeowners with the knowledge and techniques needed for effective hardwood floor repair, allowing you to restore your floors to their former glory without the expense of hiring a professional. Many homeowners are hesitant to tackle DIY floor repair, but with the right approach and understanding, it can be a rewarding and cost-effective home improvement project. From minor touch-ups to more involved repairs, this guide will break down the process into manageable steps, ensuring you feel confident in your ability to handle a variety of common issues. We will provide you with the necessary knowledge to address scratches, dents, and even water damage, helping you maintain the beauty and value of your wood flooring. This DIY approach not only saves money but also allows for a personalized touch, ensuring the repair seamlessly blends with your existing floor. For instance, a small scratch might be easily addressed with a touch-up marker, while a deeper gouge might require wood filler and sanding. Knowing how to differentiate between these repairs is essential for a successful outcome. Understanding the specific type of damage is the first step in any repair project, and this guide will walk you through identifying the problem and choosing the appropriate solution. We will cover the spectrum of common issues, from superficial scratches that can be quickly camouflaged to more extensive damage requiring a more involved approach. This knowledge will allow you to confidently tackle floor restoration projects, saving both time and money. We aim to provide a practical and accessible approach to wood scratch repair and all forms of DIY floor repair, ensuring that anyone can maintain and preserve their hardwood floors. The beauty of hardwood floors lies in their ability to age gracefully, and with the proper maintenance and care, they can last for generations. This guide will not only help you fix existing problems but also provide you with the knowledge to prevent future damage, extending the life of your beautiful hardwood flooring. By learning how to fix water damaged wood floor and addressing other common issues, you will be able to keep your floors looking their best for years to come.
Identifying the Damage
Accurate damage assessment is absolutely crucial for effective hardwood floor repair. Before beginning any DIY floor repair project, a thorough understanding of the type and extent of the damage is paramount. Surface scratches, often the most common issue, appear as light, superficial marks that primarily affect the finish layer of the wood. These are usually easily addressed with simple touch-up methods, such as markers or specialized scratch repair kits. Identifying these minor imperfections early can prevent them from becoming more significant problems down the line, and help maintain the overall aesthetic of your wood flooring.
Deeper gouges, on the other hand, penetrate the wood’s surface, affecting not just the finish but also the actual wood fibers. These types of damages require a more involved approach, typically involving filling the gouge with wood filler, followed by careful sanding to achieve a smooth, even surface. Woodworking enthusiasts understand the importance of properly preparing the surface before applying any filler or finish, ensuring a seamless repair that blends naturally with the surrounding wood. The depth and width of the gouge will dictate the type of filler and sanding technique needed, and choosing the right materials is a key step in effective floor restoration.
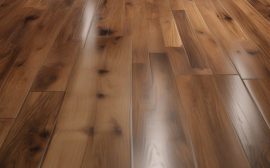
Water damage presents a different set of challenges and can manifest in various ways, including discoloration, cupping, or buckling. Discoloration often appears as dark or light spots, indicating that moisture has penetrated the wood and altered its natural color. Cupping is characterized by the edges of the wood planks rising higher than the center, creating an uneven surface. Buckling, the most severe form of water damage, occurs when the wood boards detach from the subfloor, resulting in a warped and unstable floor. Addressing water damage requires not only repairing the visible damage but also identifying and resolving the source of the moisture to prevent future issues. Proper floor maintenance and moisture control are vital in preventing these types of damages. Understanding these different manifestations of water damage is critical for determining the appropriate repair strategy, and sometimes, professional intervention may be necessary.
Beyond these common issues, it’s also important to assess the age and type of finish on your hardwood floor. Older floors might have multiple layers of finish, and the repair process may need to account for these layers to ensure a consistent final look. Similarly, different wood species and finishes react differently to repairs, so it’s beneficial to have a basic understanding of your specific flooring. For example, a high-gloss finish might require a more careful approach to sanding and refinishing than a matte finish. Knowing these nuances will help you choose the right products and techniques for your hardwood floor repair project. When considering DIY floor repair, always start with a careful evaluation of the damage and the specific characteristics of your flooring before proceeding.
Finally, it’s crucial to consider the surrounding environment when assessing damage. High humidity can exacerbate water damage, while dry conditions can lead to cracks and splits in the wood. Understanding these environmental factors can help you not only address current issues but also implement preventative measures to protect your floors in the future. For instance, using a humidifier in dry climates or a dehumidifier in humid ones can help maintain the ideal moisture level for your wood floors. By taking a holistic approach to damage assessment, you can ensure that your hardwood floor repair is effective and long-lasting, contributing to the overall value and beauty of your home.
Tools and Materials
Before embarking on any hardwood floor repair, it’s essential to assemble the correct tools and materials. This preparation is a critical step in ensuring a successful DIY floor repair project. For minor surface imperfections, touch-up markers specifically designed for wood finishes are invaluable. These markers come in a variety of shades to match different wood tones, allowing for seamless blending. Scratch repair kits, often containing a filler and a buffing pad, are ideal for slightly deeper scratches, providing a more robust solution than markers alone. These kits often include detailed instructions, making them accessible for even beginner DIY enthusiasts. When dealing with more significant damage, such as gouges or dents, wood filler becomes a necessity. This paste-like substance fills the void and, once dry, can be sanded smooth to match the surrounding floor. A putty knife, with its flat, flexible blade, is the perfect tool for applying wood filler evenly and precisely. For the sanding process, fine-grit sandpaper, typically between 120 and 220 grit, is essential for achieving a smooth, even surface. A sanding block provides a flat, stable surface for the sandpaper, preventing uneven sanding and ensuring a professional finish. If the repair area requires color correction, wood stain that closely matches the existing floor is necessary. Always test the stain in an inconspicuous area first to ensure a proper match. After staining, a protective layer of polyurethane finish will seal the repair and protect it from future damage. It’s crucial to choose a polyurethane finish that matches the existing sheen of your floor, whether it’s matte, satin, or gloss. For general cleaning and preparation, you’ll also need cleaning supplies, such as a vacuum or broom and a damp cloth. Finally, safety glasses and gloves are crucial for protecting your eyes and hands during the repair process. Remember, proper safety equipment is paramount in any home improvement project. The right tools and materials are not just about convenience; they are about ensuring a professional-looking and long-lasting repair. Having these items on hand before you begin will streamline the process and increase your chances of a successful hardwood floor repair. The investment in quality tools and materials for your DIY floor repair is an investment in the longevity and beauty of your hardwood floors. Specific product recommendations will be provided in subsequent sections to guide you in selecting the best options for your specific needs, ensuring you achieve the best possible results in your hardwood floor restoration efforts.
Repairing Minor Scratches
Minor scratches, those superficial blemishes that don’t penetrate the wood’s surface, are often easily addressed with simple DIY techniques. For these light surface abrasions, a touch-up marker designed specifically for hardwood floors offers a quick and effective solution. Select a marker that precisely matches your floor’s finish, testing it in an inconspicuous area first to ensure a seamless blend. Apply the marker gently to the scratch, using short strokes to fill the imperfection. Blend the color carefully with a soft cloth, feathering the edges to create an invisible repair. Remember, less is more; multiple light coats are preferable to one heavy application, which can lead to an uneven, noticeable patch. For slightly deeper imperfections that penetrate the wood’s surface but don’t significantly gouge the wood, consider using a hardwood floor scratch repair kit. These kits typically contain a filler material, application tools, and buffing pads. Follow the manufacturer’s instructions carefully, as application methods may vary. Most kits involve cleaning the scratched area thoroughly, applying the filler compound with a provided applicator or putty knife, and then buffing the area to blend the repair seamlessly with the surrounding finish. Choosing the right shade of filler is crucial for a natural-looking result. Test the filler in an inconspicuous area before applying it to the visible scratch. This allows you to assess the color match and adjust if necessary. Proper surface preparation is essential for effective scratch repair. Before applying any touch-up marker or filler, ensure the area is clean and free from dust, dirt, or wax buildup. Use a slightly damp cloth to wipe the area, followed by a dry cloth to remove any remaining moisture. This ensures the repair material adheres properly and blends seamlessly with the existing finish. For stubborn dirt or residue, a specialized wood floor cleaner can be used, but be sure to rinse the area thoroughly with clean water and dry completely before proceeding with the repair. In cases where the scratch is accompanied by a slight dent in the wood, a combination approach may be necessary. First, address the dent by carefully lifting the compressed wood fibers. A slightly damp cloth placed over the dent and heated with an iron on a low setting can sometimes help swell the wood back to its original level. Once the dent is minimized, proceed with the appropriate scratch repair method, either using a touch-up marker or a repair kit, depending on the remaining scratch’s depth. Remember, patience and attention to detail are key to achieving professional-looking results. Take your time, follow the instructions carefully, and test your chosen repair method in an inconspicuous area before tackling the visible scratch. With a little effort and the right tools, you can restore your hardwood floors to their former glory.
Fixing Deeper Scratches and Dents
Begin by thoroughly cleaning the damaged area with a slightly damp cloth to remove any dust, debris, or loose wood fibers. This ensures proper adhesion of the wood filler. For deeper gouges and dents in your hardwood floor, select a high-quality wood filler that closely matches the color of your existing flooring. Using a flexible putty knife, apply the filler to the damaged area, pressing it firmly into the gouge or dent, ensuring it fills the cavity completely. Overfill the area slightly, as the filler may shrink during the drying process. This meticulous application is crucial for a seamless repair that blends with the surrounding hardwood. Allow the wood filler to dry completely according to the manufacturer’s instructions. This usually takes several hours. Once dry, use a fine-grit sandpaper, around 180-220 grit, attached to a sanding block for even pressure, to smooth the filled area. Sand gently in the direction of the wood grain until the repair is flush with the surrounding floor. Avoid excessive sanding, as this could create an uneven surface or remove too much of the surrounding finish. For deeper scratches or dents that have discolored the wood, you’ll need to apply a matching wood stain after sanding. Use a small brush or cotton swab to apply the stain directly to the repaired area, blending it carefully with the surrounding wood. Allow the stain to dry completely before proceeding. This step is essential for restoring the natural beauty of your hardwood floors and achieving a professional-looking result. To protect the repair and restore the floor’s finish, apply a thin coat of polyurethane sealant over the entire repaired area. This helps to seal the repair, protect it from moisture and further damage, and blend it seamlessly with the rest of the floor. Make sure to choose a polyurethane finish that matches the sheen of your existing floor, whether it’s satin, semi-gloss, or high-gloss. For optimal protection, apply two or three thin coats of polyurethane, allowing each coat to dry completely before applying the next. This final step is essential for long-lasting durability and a beautiful, restored finish that will enhance the overall appearance of your hardwood floors. Regular maintenance, including sweeping, vacuuming, and occasional damp mopping, will help to preserve the beauty and longevity of your hardwood floors, keeping them looking their best for years to come.
Addressing Water Damage
Addressing water damage on hardwood floors requires prompt action and a clear understanding of the damage extent. For minor spills, immediate drying with a clean cloth is crucial to prevent staining and minimize water penetration. Use soft, absorbent materials to blot the affected area, avoiding harsh rubbing that could damage the finish. Even seemingly minor spills can lead to discoloration or warping if left unattended, so swift action is key to preserving your hardwood floors. For slightly more significant spills that have begun to penetrate the wood, a wet/dry vacuum can be used to extract excess water. After removing as much water as possible, ensure thorough drying by promoting airflow in the room. Use fans and dehumidifiers to expedite the drying process and prevent further moisture absorption. Monitor the affected area for any signs of warping or discoloration in the days following the incident. Deeper water damage, indicated by cupping (edges of the boards raise) or buckling (boards detach from the subfloor), presents a more complex challenge. Cupping occurs when the edges of the boards absorb more moisture than the center, causing expansion and a raised edge. Buckling, a more severe form of damage, happens when the boards lift entirely from the subfloor due to excessive moisture. These issues often necessitate professional intervention, as specialized drying equipment and potential board replacement may be required. Attempting DIY repairs for significant cupping or buckling can exacerbate the problem, leading to uneven surfaces and further damage. A professional flooring expert possesses the expertise and tools to assess the damage, implement appropriate drying techniques, and repair or replace affected boards effectively. Mold and mildew growth can be a serious consequence of water damage, posing health risks and further damaging the wood. If you detect any signs of mold or mildew, such as discoloration, musty odors, or fuzzy growth, address the issue immediately. While minor mold or mildew on the surface can sometimes be treated with a solution of bleach and water (following proper safety precautions), more extensive growth often requires professional mold remediation. This involves containing the affected area, removing mold-infested materials, and thoroughly drying and sanitizing the space. Remember, safety should always be your top priority when dealing with water damage and potential mold. Wear appropriate protective gear, such as gloves and respirators, when cleaning or handling affected materials. If the damage is extensive or you’re unsure about the best course of action, consult a qualified flooring professional for expert guidance. They can accurately assess the situation, recommend the most effective repair strategies, and ensure the long-term health and beauty of your hardwood floors. Early detection and appropriate action are crucial for mitigating the effects of water damage on hardwood floors. By understanding the different types of water damage and following the appropriate steps, you can minimize the impact and maintain the beauty and longevity of your flooring investment.
Preventing Future Damage
Protecting your hardwood floors from future damage is just as important as knowing how to repair them. A consistent maintenance routine, combined with preventative measures, will significantly extend the life and beauty of your hardwood floors, saving you time and money on extensive repairs down the road. Regular cleaning is paramount to maintaining the luster of your hardwood floors. Sweep or vacuum frequently to remove dirt and grit that can act like sandpaper, scratching the surface over time. When mopping, use a slightly damp mop and a cleaner specifically designed for hardwood floors. Avoid excessive water, as it can seep into the wood, causing warping, cupping, or buckling. Ensure the mop is just damp enough to clean effectively without leaving puddles. Placing felt or rubber pads under furniture legs is a simple yet effective way to prevent scratches and dents caused by daily movement. For heavier items, consider using wider furniture coasters to distribute the weight evenly and further minimize the risk of damage. These preventative measures will protect your floors from unsightly marks and preserve their finish. Controlling indoor humidity levels plays a crucial role in maintaining the structural integrity of your hardwood floors. Wood naturally expands and contracts with changes in humidity. Excessive moisture can cause the wood to expand, leading to cupping or buckling. Conversely, excessively dry air can cause the wood to contract, leading to gaps between boards. Maintaining a consistent humidity level between 30% and 50% helps minimize these issues and keeps your floors stable. A humidifier or dehumidifier can help regulate humidity depending on your climate and the time of year. Regularly monitoring humidity levels, especially during seasonal changes, is a proactive step in preserving your hardwood floors. Beyond cleaning and humidity control, consider using area rugs or mats in high-traffic areas like entryways and hallways. These additions not only enhance the aesthetics of your room but also provide an extra layer of protection against scratches, dents, and wear from foot traffic. Choose rugs with non-slip backing to prevent accidental slips and to avoid trapping moisture beneath them. For homes with pets, regular nail trimming is essential to prevent scratches. Consider providing designated play areas with softer flooring to minimize the impact of pet activity on your hardwood floors. Taking these proactive measures will save you from more extensive and costly repairs later on, ensuring your hardwood floors remain a beautiful and valuable asset in your home for years to come. By following these preventative measures, you can safeguard your investment in your hardwood floors and enjoy their beauty and durability for years to come. Regular maintenance and proactive prevention are key to keeping your floors looking their best while minimizing the need for extensive repairs.
Conclusion
This guide has provided you with the fundamental techniques for hardwood floor repair, ranging from simple touch-ups to more intricate fixes. Successfully executing hardwood floor repair, whether addressing minor scratches or tackling deeper dents, requires a blend of patience, the right tools, and a keen eye for detail. Remember that rushing the process or neglecting proper surface preparation can lead to unsatisfactory results, potentially requiring more extensive and costly interventions down the line. For instance, when performing wood scratch repair, taking the time to carefully match the stain and finish will make the repair virtually invisible, whereas a rushed application can create an unsightly blemish that detracts from the beauty of your floors. Mastering these DIY floor repair techniques empowers homeowners to maintain their floors’ beauty and value, saving money on professional services for common issues.
Beyond the specific repair techniques, proper floor maintenance is crucial in preserving the longevity of your hardwood floors. Regular cleaning with a microfiber mop and a pH-neutral wood floor cleaner is paramount in preventing the buildup of dirt and grit, which can act like sandpaper, causing surface scratches over time. Avoiding the use of steam cleaners and excessive water is equally important, as these can seep into the wood and cause cupping or buckling, leading to more significant and costly repairs. Furthermore, strategically placed area rugs in high-traffic areas can provide an extra layer of protection against everyday wear and tear, extending the time between necessary repairs. The choice of floor maintenance products also plays a vital role, as using harsh chemicals can degrade the finish, ultimately requiring premature refinishing.
When it comes to fixing water damaged wood floor, timing is everything. Promptly addressing spills and leaks can prevent the water from penetrating the wood and causing more extensive damage. If you notice cupping or buckling, it’s a clear indication that the wood has absorbed moisture and requires immediate attention. In some cases, minor water damage can be addressed by allowing the wood to dry completely and then performing minor repairs as detailed earlier. However, significant water damage often requires the expertise of a professional who can assess the extent of the damage and recommend the best course of action. Ignoring water damage can lead to the growth of mold and mildew, creating health hazards in addition to the structural damage to your flooring. Understanding the nuances of how moisture affects wood is crucial for effective home improvement and preventative care.
For those considering DIY floor repair, it is beneficial to begin with smaller projects and build confidence before tackling more significant repairs. Practicing on an inconspicuous area of the floor can help hone your skills and ensure that you are comfortable with the techniques before applying them to more visible areas. Investing in high-quality tools and materials is also important, as they will not only make the repair process easier but will also contribute to a more professional-looking final result. When attempting wood scratch repair, for example, using a high-quality wood filler and fine-grit sandpaper can make a significant difference in the final appearance of the repair. Always remember to prioritize safety by wearing safety glasses and gloves when working with tools and chemicals.
Ultimately, maintaining the beauty and integrity of your hardwood floors is an ongoing process that requires regular care and attention. By understanding the principles of hardwood floor repair and implementing preventative maintenance strategies, you can enjoy your floors for many years to come. Remember that while DIY repairs can address many common issues, there are times when professional help is necessary. Being able to assess the severity of the damage and knowing when to call in a professional is a key aspect of responsible home improvement. Whether you’re addressing a minor scratch or confronting water damage, approaching the task with patience and a commitment to quality will ensure the best results for your wood flooring.
When to Call a Professional
While this guide provides a comprehensive overview of DIY hardwood floor repair, there are instances when calling a professional becomes the most prudent course of action. Stubborn stains that resist conventional cleaning methods, especially those caused by pet urine or harsh chemicals, often require specialized treatments and equipment that are beyond the scope of typical DIY projects. Similarly, extensive damage such as widespread cupping or buckling across a large area, indicates underlying issues like significant moisture intrusion, which may necessitate a thorough inspection of the subfloor and surrounding structure by a trained expert. Attempting to tackle such severe damage without the requisite expertise could lead to further complications and more costly repairs down the line.
Professional hardwood floor repair specialists possess not only the necessary tools, such as industrial-grade sanding machines and precise moisture meters, but also the in-depth knowledge and years of experience to accurately diagnose the root cause of the problem and implement effective solutions. For example, a seemingly simple water stain might actually be indicative of a hidden plumbing leak or inadequate ventilation, both of which need to be addressed to prevent recurrence. Similarly, a large area of scratches may require a full refinishing of the floor, a task that demands meticulous sanding, staining, and sealing techniques to achieve a uniform and long-lasting result. Professionals are also skilled at matching existing wood species and finishes, ensuring a seamless repair that blends flawlessly with the rest of your floor.
In cases of significant water damage, particularly if mold or mildew is present, it is crucial to prioritize your health and safety by seeking professional help immediately. Mold spores can cause a variety of respiratory issues and other health problems, and attempting to remove it without proper protective gear and containment methods can expose you and your family to unnecessary risks. Professional remediation experts are equipped with specialized equipment and training to safely remove mold and repair the damaged areas, ensuring a healthy indoor environment. Deciding when to call a professional is not about admitting defeat but rather about being practical and recognizing the limitations of your own skills and resources. It is a strategic decision that can save you time, money, and potential headaches in the long run, while ensuring the longevity and beauty of your hardwood floors.
Furthermore, consider the value of your time and the potential cost of making mistakes. A poorly executed DIY repair could actually lower the value of your home and require professional rectification later on, adding to the overall cost. For instance, incorrect sanding techniques can leave swirl marks or uneven surfaces, necessitating a complete re-sanding by a professional. Similarly, an improperly applied stain or finish can result in a blotchy or mismatched appearance. Therefore, if you are unsure about your ability to achieve a professional-quality result, it is always wise to err on the side of caution and consult a flooring expert. A consultation can provide a clear assessment of the damage, a realistic estimate of the repair costs, and peace of mind knowing that your hardwood floor repair is being handled by a qualified professional. Remember, the goal is not just to fix the immediate damage but to preserve the beauty and value of your wood flooring for years to come. Investing in professional expertise is often a wise choice, especially for complex or extensive hardwood floor restoration projects.