Introduction: Reviving Your Hardwood Floors on a Budget
Hardwood floors, a timeless emblem of elegance and durability, often bear the brunt of daily life. Scratches, dents, and a faded finish can diminish their allure, transforming a once-stunning feature into an eyesore. While professional hardwood floor refinishing offers a pristine result, the cost can be prohibitive, ranging from $3 to $8 per square foot, especially challenging for Overseas Filipino Worker (OFW) parents managing long-distance relationships and household budgets. DIY flooring presents a compelling alternative, empowering homeowners to reclaim the beauty of their floors while saving a considerable amount of money.
This comprehensive guide provides the knowledge and techniques to achieve professional-quality results at home, saving money and adding significant value to your property. We’ll explore everything from assessing floor damage to applying the final coat of sealant, emphasizing safety and offering practical solutions to common problems. Embarking on a wood floor restoration project is more than just a cosmetic upgrade; it’s an investment in your home’s value and aesthetic appeal. According to the National Association of Realtors, refinishing hardwood floors can offer a significant return on investment, often exceeding the cost of the project itself.
Moreover, DIY projects like sanding hardwood floors and applying a fresh polyurethane finish can be incredibly satisfying, providing a sense of accomplishment and personalization that professional services can’t replicate. By understanding the nuances of wood types, stain options, and finishing techniques, homeowners can tailor their floors to perfectly match their style and décor. This guide will delve into the intricacies of DIY hardwood floor refinishing, focusing on techniques and materials that gained prominence in the 2010s and continue to be relevant today.
We’ll explore the benefits of water-based finishes over traditional oil-based options, discuss the proper methods for staining wood floors to achieve desired color tones, and provide detailed instructions for floor maintenance to prolong the life of your newly refinished floors. Whether you’re a seasoned DIY enthusiast or a first-time home improvement novice, this resource will equip you with the confidence and skills to transform your worn hardwood floors into a stunning centerpiece of your home. From selecting the right grit sandpaper to mastering the art of applying a flawless polyurethane finish, we’ll cover every aspect of the process, ensuring a successful and rewarding DIY experience. This guide also addresses the unique challenges and opportunities present in the DIY flooring space, providing targeted advice for common issues and innovative solutions.
Assessing Floor Damage and Refinishing Feasibility
Before embarking on this hardwood floor refinishing project, a meticulous assessment is crucial, serving as the foundation for a successful DIY flooring endeavor. Begin by accurately identifying the wood species. Oak, with its prominent grain, maple, known for its smooth, subtle patterns, and hickory, prized for its hardness and durability, are common choices. Understanding the wood’s characteristics directly influences sanding techniques and stain absorption. Consider, for example, that maple’s tight grain requires finer sandpaper grits to avoid scratching, while oak readily accepts stain, allowing for a broader range of color options.
Furthermore, the existing finish dictates the removal process. Polyurethane, varnish, shellac, and wax each react differently to solvents and sanding. A simple test using denatured alcohol can differentiate between them; a softening finish indicates shellac or varnish, whereas polyurethane exhibits greater resistance. Correct identification ensures you select the appropriate stripping agents or sanding grits, preventing damage and saving valuable time. The subfloor’s condition is equally paramount to the success of your wood floor restoration. Carefully inspect for loose boards, indicated by squeaks or visible movement, and address any signs of water damage, such as discoloration, warping, or mold.
Repairing these issues *before* sanding is essential for a lasting, even finish. Ignoring subfloor problems will only lead to recurring issues, potentially compromising the integrity of the newly refinished floor. For instance, loose boards can be secured with wood screws, while water-damaged sections may require replacement. According to the National Wood Flooring Association (NWFA), proper subfloor preparation accounts for up to 30% of a successful hardwood floor refinishing project. Addressing these foundational elements ensures a stable and level surface, preventing future problems and maximizing the lifespan of your refinished floor.
However, not all floors are suitable candidates for DIY hardwood floor refinishing. Evaluate the thickness of the remaining wear layer – the wood above the tongue and groove. Floors that have been sanded multiple times may have a very thin wear layer, making them vulnerable to damage during sanding. Excessive sanding in such cases can expose the tongue and groove, rendering the floor irreparable. Deep gouges, significant warping, or extensive water damage might also necessitate professional intervention. As Bob Vila, the renowned home improvement expert, often advises, “Knowing when to call in a professional is just as important as knowing how to do it yourself.” If you’re uncertain about the extent of the damage or the floor’s suitability for refinishing, consulting a flooring contractor is a wise investment, preventing costly mistakes and ensuring a beautiful, long-lasting result.
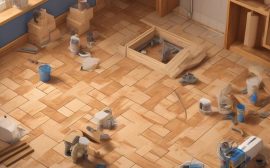
Essential Tools and Materials Checklist
Success hinges on having the right tools and materials. Here’s a comprehensive checklist: Sanders: Drum sander (for large areas), edge sander (for edges and corners), orbital sander (for fine sanding). Sandpaper: A range of grits (36, 60, 80, 100, 120) for progressive sanding. Stain (optional): Choose a color that complements your decor. Sealant: Polyurethane (oil-based or water-based) for durability and protection. Oil-based provides a richer amber tone, while water-based is clearer and dries faster. Applicators: Paintbrushes, rollers, or lambswool applicators for stain and sealant.
Safety Gear: Safety glasses, dust mask or respirator, ear protection, gloves. Other Essentials: Wood filler, putty knife, vacuum cleaner, tack cloth, mineral spirits (for oil-based products). Rent professional-grade sanders from a reputable tool rental company. Ensure they are in good working order and come with proper instructions. Don’t skimp on safety gear; protecting your lungs and eyes is paramount. Selecting the right sandpaper grits is crucial for effective sanding hardwood floors. Start with a coarse grit (36-40) to remove the existing finish and address any significant imperfections.
Progress to medium grits (60-80) to smooth out the surface and eliminate scratches left by the coarser paper. Finally, use fine grits (100-120) for the final sanding, creating a smooth, even surface ready for staining or sealing. The key to successful DIY flooring is patience; avoid skipping grits, as this can lead to visible scratches and an uneven finish that will detract from the final result of your wood floor restoration. Investing in high-quality sandpaper will also improve efficiency and the overall quality of your home improvement project.
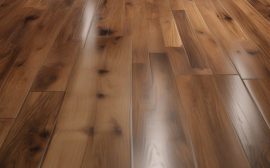
The choice between oil-based and water-based polyurethane finish depends on the desired aesthetic and performance characteristics. Oil-based polyurethane offers exceptional durability and a warm, amber hue that enhances the natural beauty of wood floors. However, it has a strong odor, requires longer drying times, and contains higher levels of VOCs. Water-based polyurethane, on the other hand, is low in odor and VOCs, dries quickly, and provides a clear finish that won’t yellow over time. While it may not be as durable as oil-based options, advancements in water-based formulations have significantly improved their scratch resistance and overall performance, making them a viable option for many DIY projects.
Consider the specific needs of your floor and your personal preferences when making this decision. Beyond the basics, several specialized tools and materials can significantly improve the outcome of your hardwood floor refinishing project. A random orbital sander, for instance, is invaluable for achieving an ultra-smooth finish and blending edges seamlessly. For filling gaps and imperfections, consider using a high-quality wood filler that matches the color of your wood. A moisture meter is also a worthwhile investment, as it allows you to accurately assess the moisture content of the wood before applying any finish, preventing potential problems like cupping or buckling. Finally, don’t underestimate the importance of proper floor maintenance products. Using pH-neutral cleaners specifically designed for hardwood floors will help protect your investment and keep your floors looking their best for years to come. These additions can elevate your woodworking skills and the quality of your DIY projects.
Step-by-Step Sanding Process
Sanding is, without question, the most critical phase of hardwood floor refinishing, demanding patience and meticulous execution. Begin with the edge sander, meticulously working along the perimeter of the room where the larger drum sander cannot reach. Overlap each pass by approximately 25-50% to ensure uniform material removal and prevent unsightly ridges or swirl marks. This initial edging sets the stage for a seamless blend with the field sanding to follow. As veteran wood floor restoration expert, Bob Vila, emphasizes, “The key to a professional-looking refinish lies in the preparation.
Skimp on sanding, and you’ll regret it later.” This sentiment underscores the importance of thoroughness in this stage of DIY flooring. Next, deploy the drum sander, navigating the room in long, even strokes parallel to the wood grain. This prevents cross-grain scratches that are difficult to remove. Initiate the process with a coarse grit sandpaper, typically 36 or 40, to efficiently eliminate the existing finish, deep scratches, and ingrained imperfections. Overlap each pass by roughly 50% to avoid creating dips or humps in the floor.
According to the National Wood Flooring Association (NWFA), proper drum sander technique is paramount for achieving a flat, even surface. After each sanding pass, thoroughly vacuum the floor using a shop vacuum equipped with a brush attachment to remove all traces of dust and debris. This ensures the subsequent grit can effectively abrade the wood rather than simply grinding dust into the surface. Progressively increase the sandpaper grit to 60, 80, 100, and finally 120, repeating the sanding process with each grit.
This gradual refinement ensures a flawlessly smooth surface, ready to accept stain and polyurethane finish. The final pass with 120-grit sandpaper should leave the wood feeling almost silky to the touch. Pay particular attention to corners, closets, and other hard-to-reach areas that the drum sander cannot access. Hand-sanding with a sanding block or orbital sander may be necessary to achieve consistent smoothness in these spots. Remember to frequently empty the dust bag of the sander to maintain optimal suction and prevent the motor from overheating. Effective dust collection is not only crucial for the sander’s performance but also for maintaining a clean and safe working environment during this home improvement project. The investment in proper sanding technique during hardwood floor refinishing is an investment in the long-term beauty and durability of your wood floors.
Staining and Finishing Application
The staining and finishing stages of hardwood floor refinishing are where your vision truly takes shape, demanding patience and meticulous attention to detail. Before committing to a particular hue across the entire floor, testing your chosen stain in an inconspicuous area, like a closet or under a piece of furniture, is paramount. This small step can save you from a large-scale disappointment. Apply the stain evenly, meticulously following the manufacturer’s instructions regarding application methods and drying times.
Whether you opt for a brush, foam pad, or rag, remember that less is often more. Wiping off excess stain is crucial to prevent unsightly blotching and ensure a consistent color across the wood grain. Different wood species absorb stain differently; oak, for example, typically takes stain very well, while maple can be more challenging and may require a wood conditioner. Allow ample drying time, typically 24-48 hours, before proceeding to the protective sealant. For those seeking a deeper, richer color, multiple thin coats of stain can be applied, with thorough drying between each application.
Remember to lightly buff with a fine grit sandpaper (220 or higher) between coats to ensure proper adhesion and a smooth final finish. This ensures each layer bonds properly, preventing peeling or chipping down the line, and contributes significantly to the longevity of your DIY flooring project. Once the stain has fully cured, the application of a protective sealant, typically polyurethane, is the next critical phase. Polyurethane safeguards the stained wood from scratches, moisture, and everyday wear and tear.
Opt for a high-quality applicator, such as a lambswool applicator or a synthetic brush designed for polyurethane, to ensure a smooth, even application. Apply thin, even coats, avoiding drips or puddles. Multiple thin coats are far superior to a single thick coat, which can lead to bubbling, clouding, or prolonged drying times. Allow each coat to dry completely, strictly adhering to the manufacturer’s recommended drying times, which can vary depending on the product and environmental conditions.
Lightly sanding between coats with an ultra-fine grit sandpaper (220-320 grit) is essential for creating a smooth surface and promoting optimal adhesion between coats. This step, often overlooked, is a hallmark of professional wood floor restoration. Thoroughly remove all sanding dust with a tack cloth before applying the next coat of polyurethane. Addressing potential issues like blotching proactively is key to a successful hardwood floor refinishing project. Blotching occurs when stain is absorbed unevenly, resulting in dark and light patches.
To mitigate this, consider using a wood conditioner *before* applying the stain. Wood conditioners penetrate the wood fibers, evening out the porosity and promoting more uniform stain absorption, particularly on woods like pine, birch, and maple, which are notorious for blotching. Alternatively, consider using gel stains, which sit on the surface of the wood rather than penetrating deeply, offering greater control over color consistency. Another technique is to apply a very thin “wash coat” of diluted shellac before staining; this seals the wood slightly, reducing its absorbency. Experimenting with different techniques on scrap wood is always advisable before tackling the entire floor. Remember, proper preparation is the cornerstone of any successful DIY project, especially when it comes to staining wood floors.
Post-Refinishing Care and Maintenance
Once the final coat of sealant has fully cured, typically after 72 hours, your revitalized hardwood floor is ready for light use. However, patience is key during this initial period. Refrain from placing heavy furniture or area rugs for at least a week to allow the polyurethane finish to achieve its maximum hardness and prevent premature scratching or indentation. This curing period is crucial for the long-term durability of your DIY flooring project. Premature placement of heavy items can disrupt the bonding process of the finish, leading to imperfections and a compromised final result.
Consider this waiting period an investment in the longevity and beauty of your wood floor restoration. Effective floor maintenance is paramount to preserving the beauty and extending the lifespan of your hardwood floor refinishing endeavor. Regular cleaning with a damp cloth or mop, using a pH-neutral cleaner specifically formulated for hardwood floors, is essential. Harsh chemicals, abrasive cleaners, and even steam mops should be strictly avoided, as they can dull or damage the polyurethane finish.
Implement preventative measures, such as placing felt pads under furniture legs, to minimize scratches and dents. In high-traffic areas, utilize area rugs to provide an additional layer of protection against wear and tear. These simple steps will significantly reduce the need for future wood floor restoration efforts. Addressing minor imperfections promptly is crucial in maintaining the pristine condition of your refinished hardwood floors. For superficial scratches, a touch-up pen or wax filler that precisely matches the floor’s color can effectively conceal the blemish.
For deeper scratches that penetrate the finish, a more involved approach is required. Lightly sand the affected area with a fine-grit sandpaper (220 grit or higher), being careful not to remove too much of the surrounding finish. Clean the sanded area thoroughly and apply a thin, even coat of polyurethane finish, feathering the edges to blend seamlessly with the existing finish. Allowing it to dry completely will restore the floor’s appearance and prevent further damage.
Regularly sweeping or vacuuming the floor to remove dirt and debris is also important. These practices are key to successful home improvement and woodworking. To ensure the enduring beauty and protection of your hardwood floors, consider re-coating them with a fresh layer of polyurethane every few years. This preventative measure adds an extra layer of protection against wear and tear, effectively prolonging the life of your sanding hardwood floors and staining wood floors work. The frequency of re-coating depends on the level of foot traffic and the overall wear and tear the floor experiences. A simple test to determine if re-coating is necessary involves observing the floor’s sheen. If the finish appears dull or scratched, it’s likely time for a fresh coat. This proactive approach to floor maintenance will help maintain the value and aesthetic appeal of your home, making your DIY projects and hardwood floor refinishing efforts truly worthwhile.
Troubleshooting Common Problems
Even with meticulous planning, hardwood floor refinishing can present challenges. Rushing the sanding process is a frequent misstep in DIY flooring projects, resulting in visible imperfections beneath the new finish. Insufficient sanding leaves remnants of the old finish or existing scratches, undermining the entire wood floor restoration effort. Conversely, applying excessive stain or sealant often leads to unsightly drips, runs, and an uneven finish. Mastering the art of sanding hardwood floors requires patience and attention to detail; each pass should slightly overlap the previous one, ensuring a smooth and consistent surface.
Blotching, an uneven stain absorption, is another common concern. This can be mitigated by pretreating the wood with a wood conditioner, which evens out the wood’s porosity, or by opting for a gel stain, known for its controlled application and reduced tendency to blotch. For those undertaking home improvement projects involving darker stains, understanding wood grain and species is crucial. Some woods, like pine, are particularly prone to blotching and require extra care. Experimenting on scrap wood is always advisable before committing to the entire floor.
A cloudy or hazy polyurethane finish often indicates trapped moisture. Before applying the finish, ensure the floor is completely dry and maintain proper ventilation throughout the drying process. Temperature and humidity play significant roles; consult the finish manufacturer’s guidelines for optimal conditions. Fish eyes, those frustrating small craters in the finish, typically arise from surface contamination with oil, silicone, or even lingering residue from cleaning products. A thorough cleaning with mineral spirits or a specialized wood cleaner before applying the finish is essential to prevent this. Consider a tack cloth wipe-down as a final measure to remove any remaining dust particles, ensuring a pristine surface for the polyurethane finish. Proper floor maintenance begins even before the first coat.
Trends and Innovations (2010-2019)
The 2010s marked a significant shift in hardwood floor refinishing, driven by environmental concerns and evolving aesthetic preferences. Water-based polyurethanes experienced a surge in popularity, largely due to their low VOC (volatile organic compound) content, aligning with a growing demand for eco-friendly home improvement solutions. These finishes offered a less pungent odor compared to traditional oil-based alternatives, making the DIY process more appealing to homeowners. According to the National Wood Flooring Association (NWFA), the market share for water-based finishes increased by nearly 30% during this period, indicating a clear preference for greener options in both residential and commercial settings.
This trend reflects a broader movement within the DIY community towards sustainable practices and healthier living environments. Beyond eco-consciousness, the 2010s also witnessed a stylistic evolution in wood flooring. Wide-plank hardwood flooring emerged as a prominent trend, offering a more modern and spacious aesthetic compared to narrower planks. Interior designers frequently incorporated wide planks to create a sense of openness and visual continuity, particularly in contemporary homes. Gray-toned stains and matte finishes gained traction as well, reflecting a departure from the warmer, glossy tones that dominated previous decades.
These cooler, more subdued hues provided a versatile backdrop for a range of interior design styles, from minimalist to Scandinavian. Many homeowners found that these choices helped to modernize existing homes without completely altering the original character of the space. The democratization of information and access to tools further fueled the DIY hardwood floor refinishing movement. The rise of online resources, including YouTube tutorials, DIY blogs, and online forums, provided homeowners with unprecedented access to expert advice and peer support.
This wealth of information empowered individuals to tackle refinishing projects with greater confidence. Tool rental companies also played a crucial role by expanding their offerings and providing access to professional-grade equipment, such as drum sanders and edge sanders, at affordable prices. “We saw a significant increase in DIYers renting our equipment during the 2010s,” notes Bob Vila, a renowned home improvement expert. “The combination of readily available information and accessible tools made hardwood floor refinishing a viable option for many homeowners seeking to enhance their living spaces on a budget.” This confluence of factors transformed hardwood floor refinishing from a specialized trade to a more accessible DIY project, empowering homeowners to revitalize their homes and express their personal style.
Safety Precautions
Safety is paramount in any home improvement endeavor, and hardwood floor refinishing is no exception. The process of sanding hardwood floors generates significant dust, composed of fine wood particles and potentially harmful remnants of old finishes. Therefore, wearing safety glasses with side shields is crucial to protect your eyes from flying debris. A properly fitted dust mask, at minimum an N95 respirator, is essential to prevent inhalation of these particles, safeguarding your respiratory system. Ear protection, such as earplugs or earmuffs, will mitigate the noise from power sanders, preventing potential hearing damage during this prolonged DIY flooring project.
Beyond personal protective equipment, adequate ventilation is non-negotiable. Open windows and doors to create cross-ventilation, and consider using a fan to circulate air and expel dust. The fumes from stains and polyurethane finish products can be potent and harmful; proper ventilation significantly reduces the risk of respiratory irritation and potential long-term health effects. Furthermore, ensure that the work area is completely clear of obstructions. Electrical cords should be routed safely to prevent tripping hazards, and children and pets must be kept away from the area to avoid accidents involving power tools or exposure to hazardous materials.
Safe woodworking practices demand a focused and controlled environment. Proper disposal of materials is equally important. Used sandpaper, stain-soaked rags, and sealant applicators pose a fire hazard due to the potential for spontaneous combustion. These items should be placed in a sealed metal container filled with water to prevent oxidation and heat buildup. Contact your local waste management authority for guidance on proper disposal procedures in accordance with local regulations. Finally, before commencing any stage of the hardwood floor refinishing process, meticulously review the manufacturer’s instructions for all tools and materials. If uncertainty arises regarding any aspect of the project, consulting with a qualified professional is always a prudent decision. Remember, prioritizing safety ensures not only a successful wood floor restoration but also the well-being of yourself and your household.
Conclusion: A Rewarding Transformation
DIY hardwood floor refinishing is a rewarding project that can transform your home. By carefully assessing the floor’s condition, using the right tools and materials, following the step-by-step instructions, and prioritizing safety, you can achieve professional-looking results at a fraction of the cost of hiring a professional. This guide provides a solid foundation for success, but remember that every project is unique. Be patient, pay attention to detail, and don’t be afraid to seek help when needed.
With a little effort and dedication, you can restore your hardwood floors to their former glory and enjoy their beauty for years to come. For OFW parents managing long-distance relationships, this project can be a fulfilling way to invest in their family’s home and create a welcoming space for their loved ones. Achieving a flawless polyurethane finish, the hallmark of professionally restored floors, demands meticulous preparation. Sanding hardwood floors correctly is paramount; uneven surfaces will telegraph imperfections through the final coats.
Consider renting professional-grade equipment – while an added expense, drum sanders from reputable brands offer superior dust collection and consistent performance, minimizing swirl marks and ensuring a level surface ready to accept stain. Don’t underestimate the importance of proper ventilation during the staining wood floors and finishing stages; invest in a quality respirator to protect yourself from harmful VOCs. Beyond the immediate gratification of revitalized floors, mastering DIY flooring techniques unlocks a wealth of home improvement possibilities.
The skills acquired during a hardwood floor refinishing project translate directly to other woodworking endeavors, fostering a deeper appreciation for craftsmanship and empowering homeowners to tackle future repairs and renovations. Consider, for instance, building custom shelving or crafting furniture pieces to complement your newly refinished floors. The satisfaction derived from completing such DIY projects extends beyond mere cost savings; it’s about imbuing your living space with a personal touch and cultivating a sense of accomplishment.
Remember that effective floor maintenance is crucial to preserving your hard work and extending the lifespan of your restored floors. Moreover, the economic advantages of DIY wood floor restoration extend beyond the initial savings on labor costs. Properly maintained hardwood floors increase a home’s resale value, making it a sound investment for the future. Regular cleaning with pH-neutral cleaners, prompt attention to scratches and dents, and the strategic use of rugs in high-traffic areas can significantly prolong the beauty and durability of your floors.
By embracing the principles of responsible homeownership and investing in the long-term care of your hardwood floors, you’re not only enhancing your living environment but also building equity and securing your family’s financial future. This project can serve as a powerful example of resourcefulness and dedication for children, especially in families where resources are carefully managed. By involving them in age-appropriate tasks, parents can instill valuable life skills and foster a sense of shared accomplishment.